Before we begin with JMeter API load testing, make sure you have basic knowledge of JMeter, You can check this “What is JMeter? Introduction & Uses” from our first JMeter Blog.
The Simple Test plan of JMeter is that one user is hitting only one API/request. But in the real scenario, multiple users will always be there who will hit either a single API or multiple APIs. This can be understood by a simple example that a live application will be used by many users simultaneously and also multiple requests can be send by the same user on that application. Thus checking the application with this test scenario is very important. In JMeter, we can create multiple users and multiple requests and also a combination of both of them.
Let’s understand this with examples:
Scenario 1 : How to send 10 requests per second?
=> Steps to Perform API Testing in JMeter
1. Adding a Thread Group
- Firstly, you have to start your JMeter and select the Test Plan.
- Next, Right click on the Test Plan and add a Thread Group.
- Rename the Thread Group and save it.
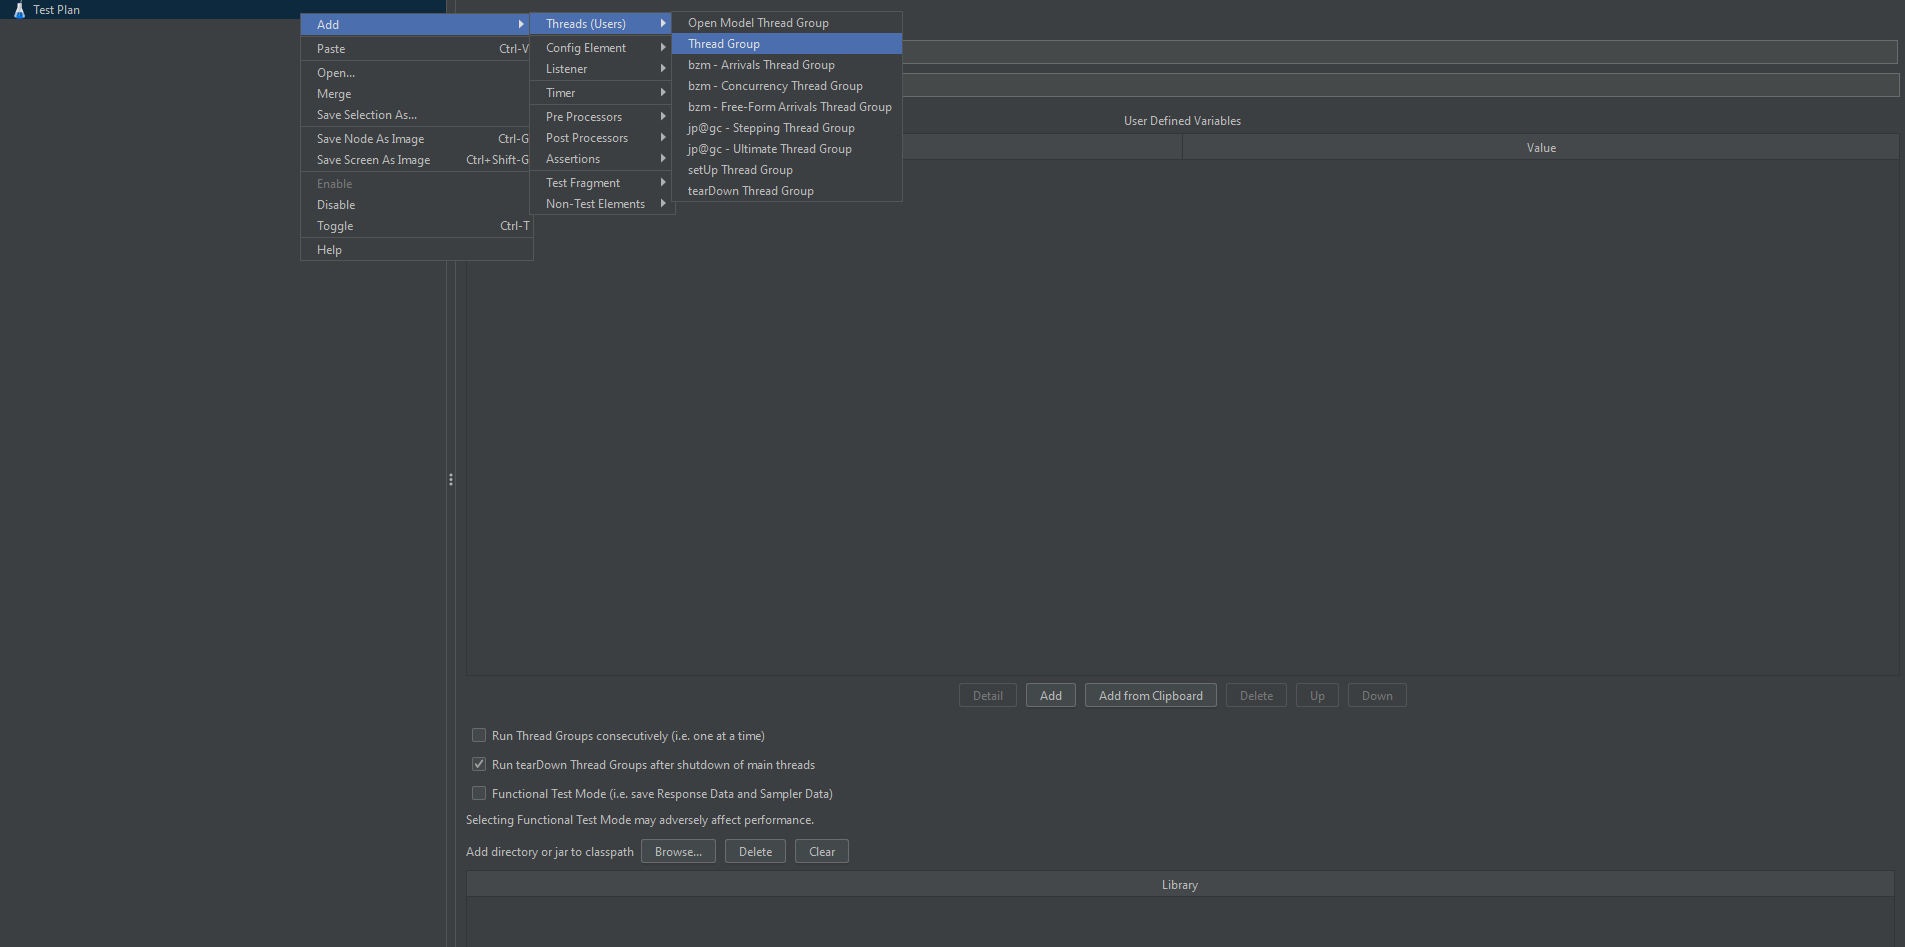
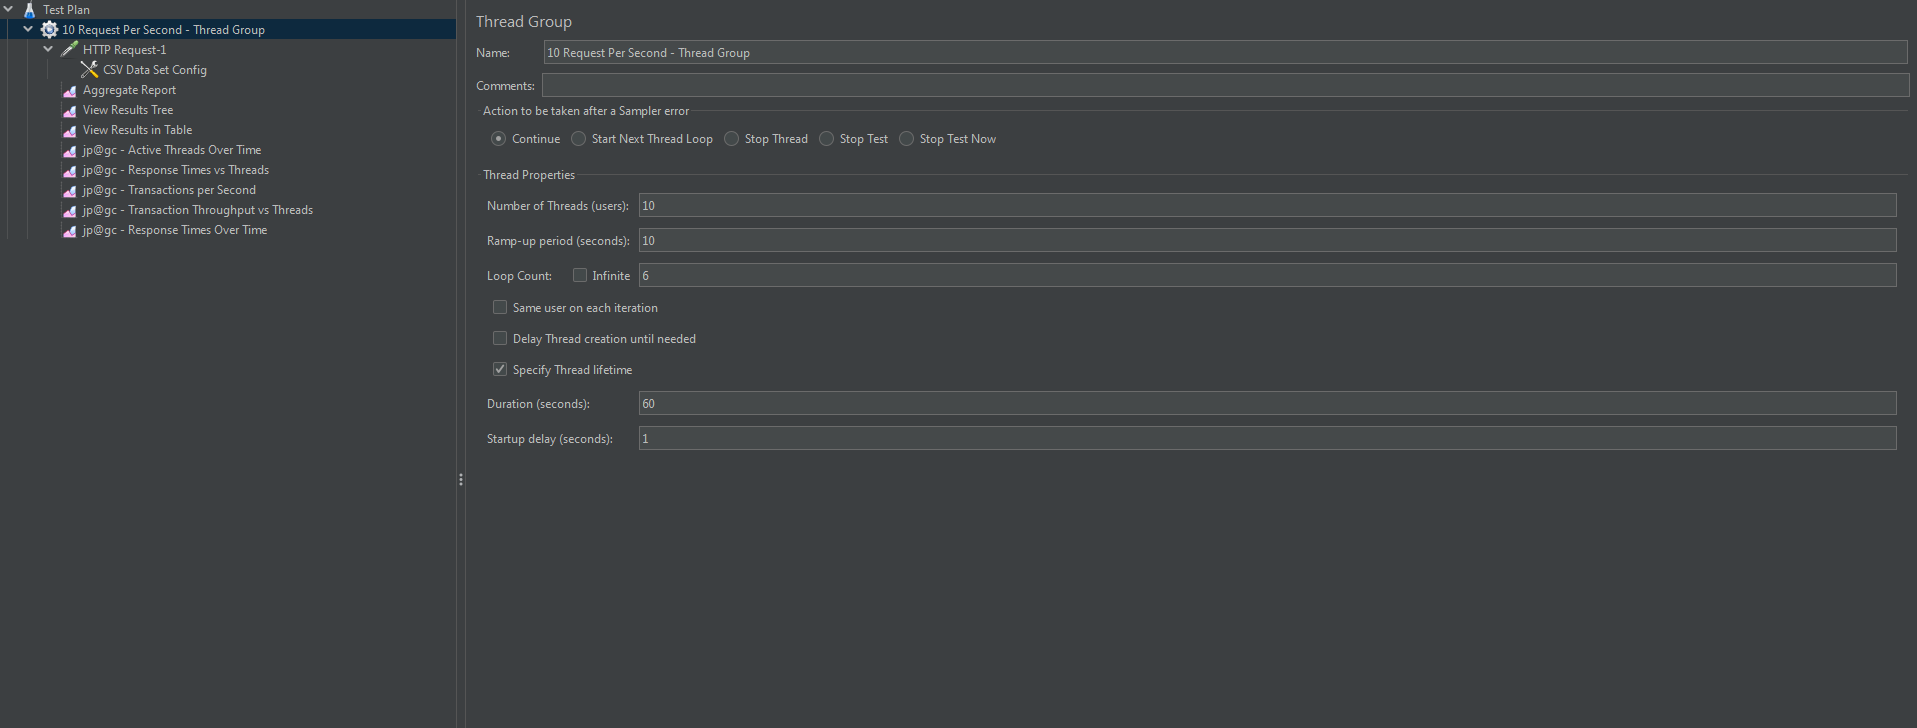
- Add Thread Group Property as per below.
- Number of Threads (Users) : 10
- Ramp-up period(seconds) : 10
- Loop Count : 6
- Specify Thread lifetime :
Duration(Seconds) : 60
Startup delay (Second): 1
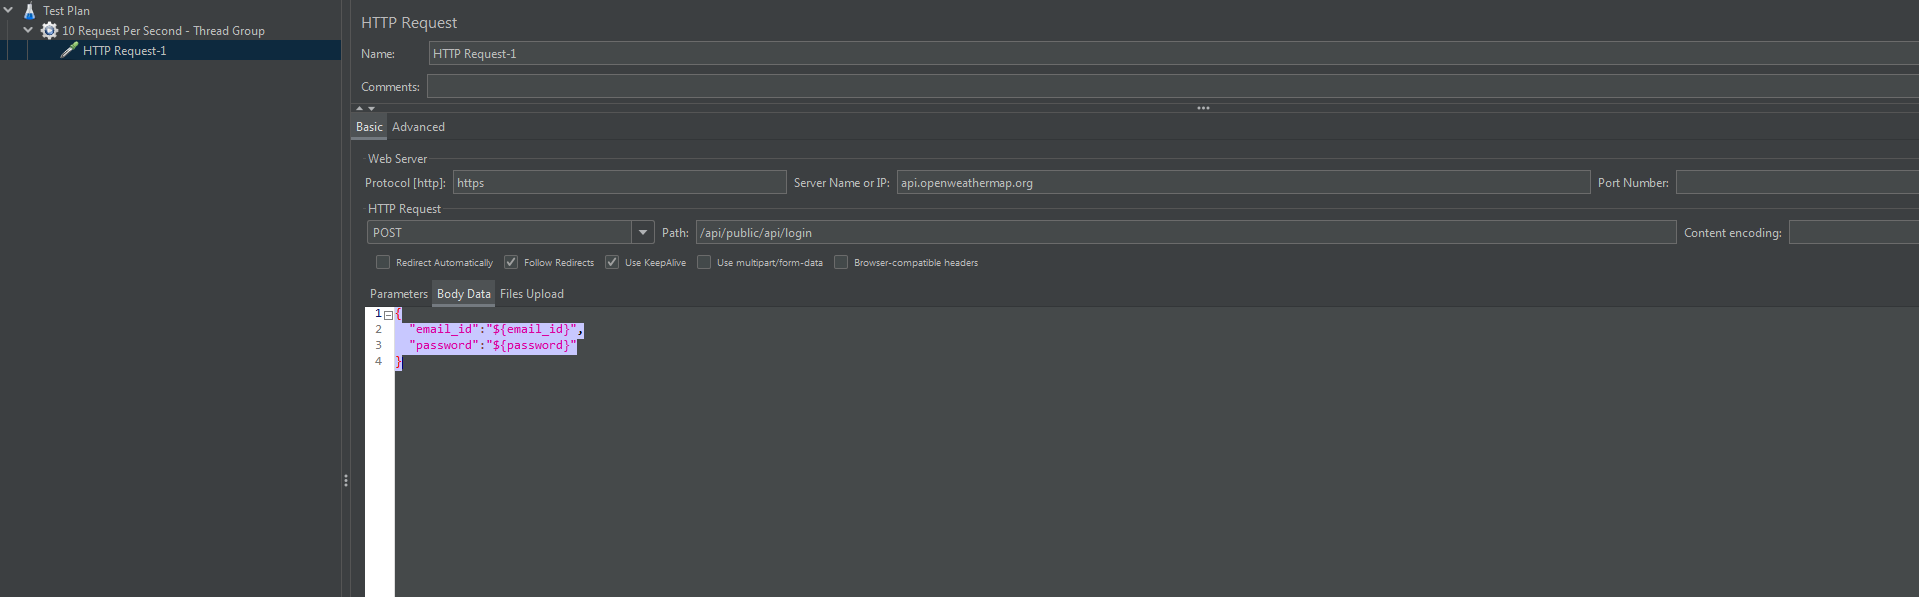
2. Add an HTTP Request Sampler
- Next, you have to add HTTP Request and enter the Server name or IP of your API and set the Path and Parameters. Right-click on Thread Group, select Sampler and add HTTP Request.
- Rename the HTTP Request.
- Here I have changed the sampler name as HTTP Request-1 and add the parameters, select the method type and give the path of the login page as below image.
- Add the parameter, I have given “email_id” & “password” as a parameter and the value is Functions(this value we will fetch from the CSV file)
3. Adding CSV Data Set Config
Create a text file and enter values into it. Now save the text file with proper name and “.csv” extension.

Then, in JMeter create a CSV Data Set Config under the Thread Group. Click on “HTTP Request-1-> Add->Config Element -> CSV Data Set Config”.
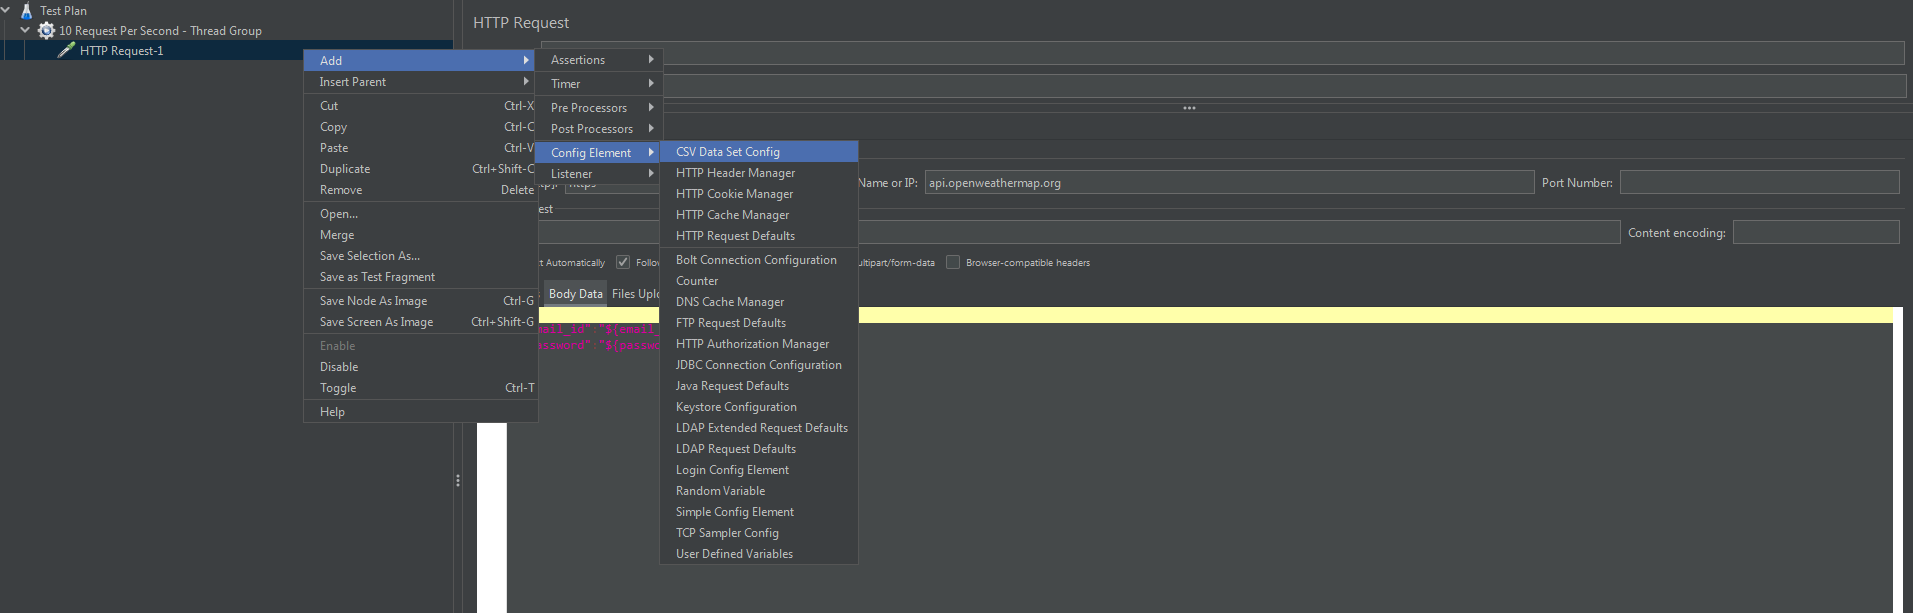
Now, open CSV Data Set Config and enter exact Filename and Parameters.
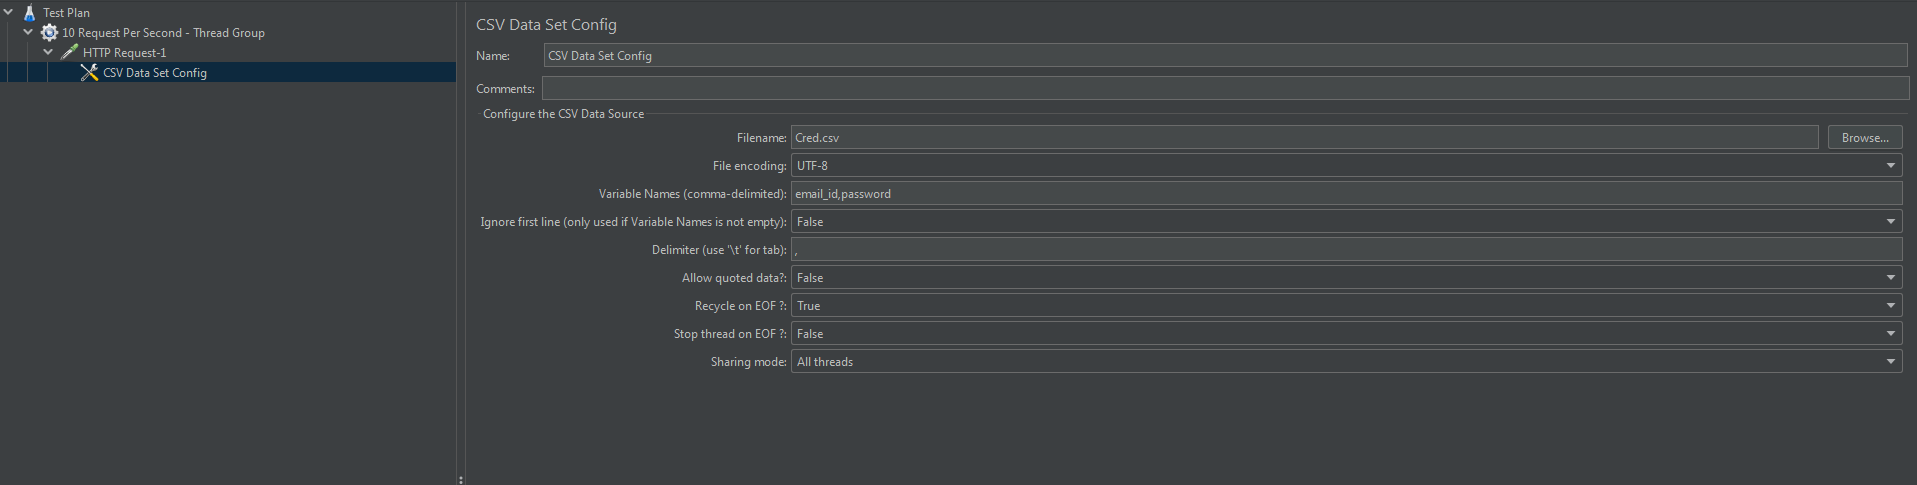
CSV file path : If you have created CSV file in bin folder then you have to just give file name with extension otherwise you have to give absolute path : C:\Users\ob-7\Downloads\cred.csv
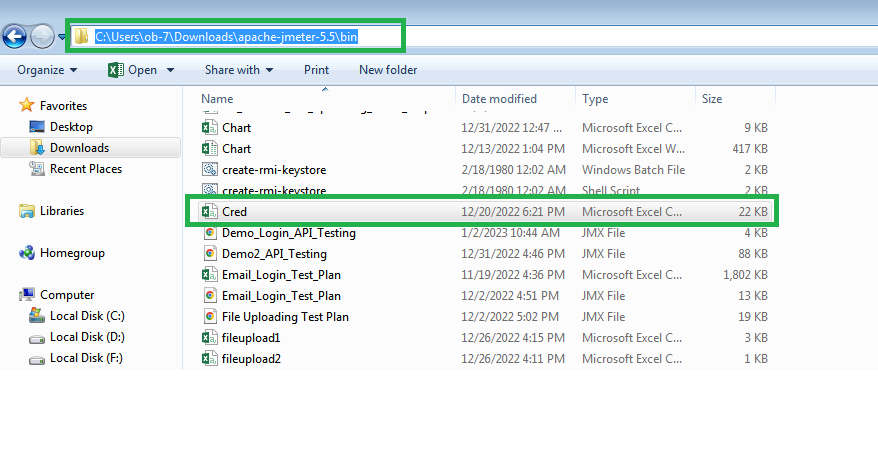
This below image is showing how I am saving my file in CSV format.
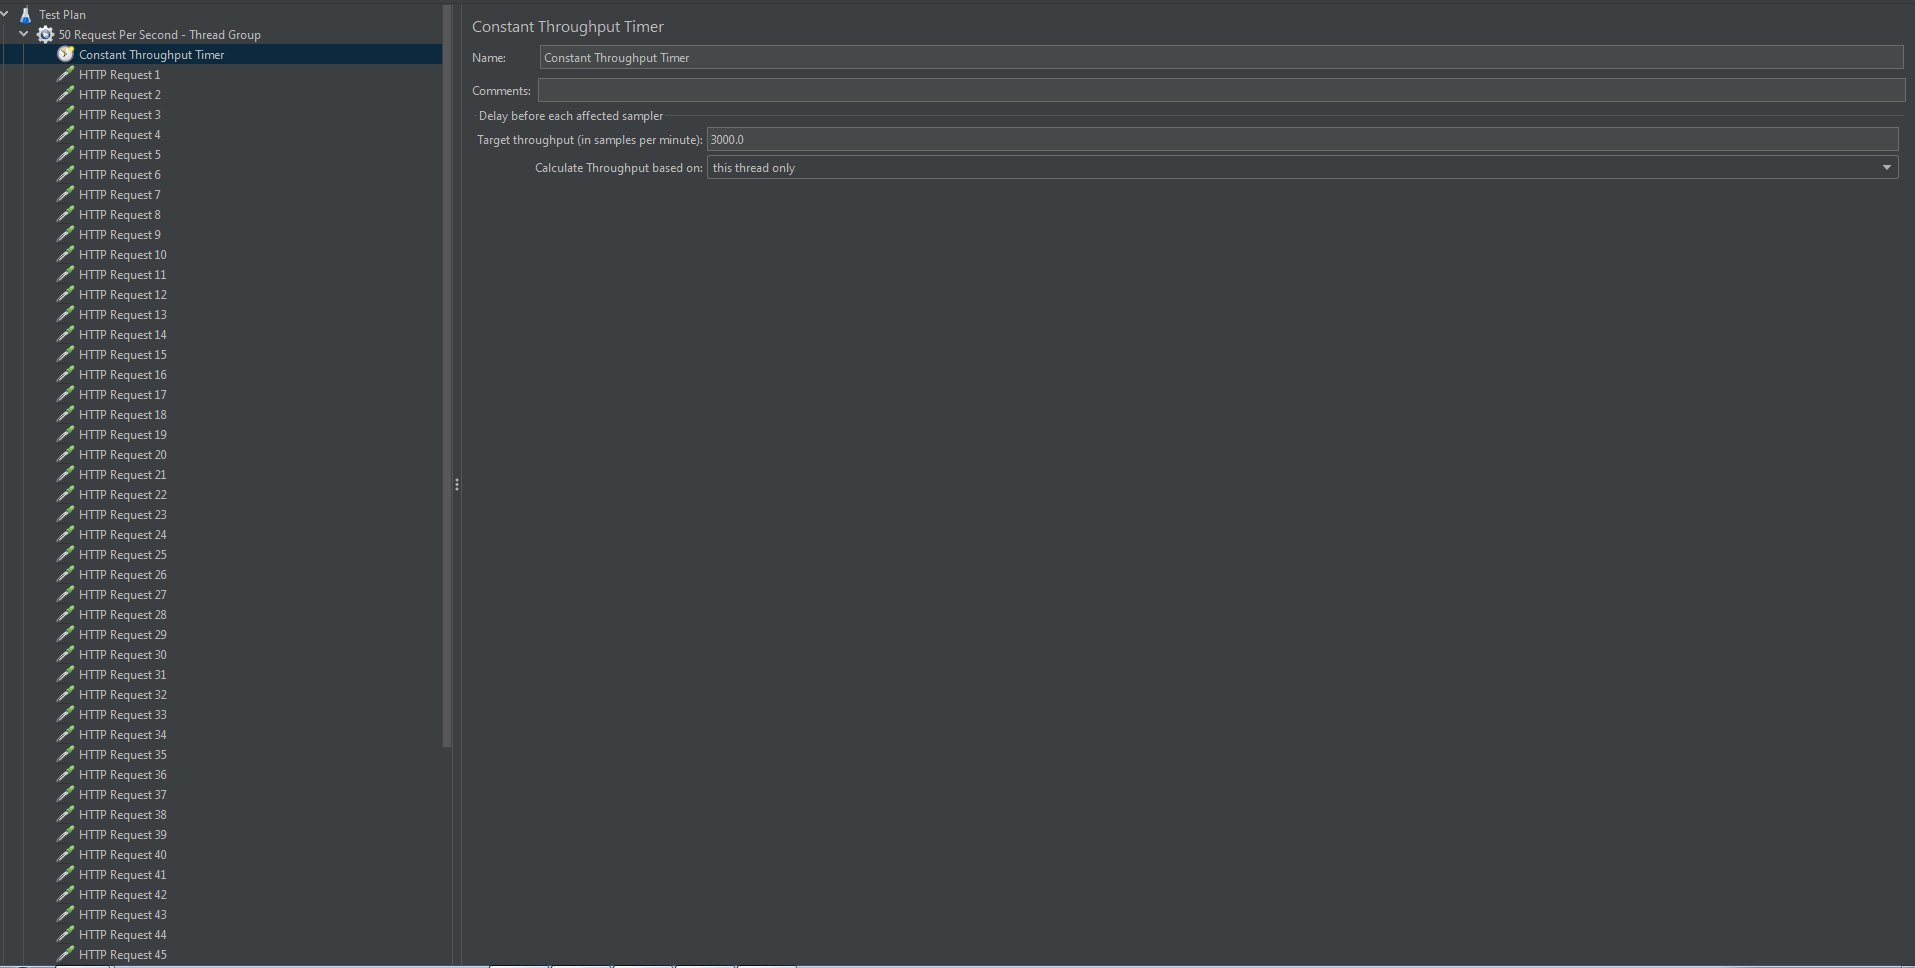
4. Add Constant Throughput Timer
- JMeter Constant Throughput Timer is used as a goal-oriented element which helps to achieve the desired throughput (Total Number of Requests). This timer tries to maintain a constant throughput throughout the test and achieve the target. Of course, if the server is not able to handle such a load, the throughput will be lower.
- If you want to execute a Goal-oriented scenario where the target is not to simulate the number of concurrent users, but the number of requests per second then Constant Throughput Timer is best for such type of scenario. A Constant Throughput Timer works precisely on the “minute” level, so make sure that your test lasts long enough (1 minute or more) and you use a reasonable ramp-up time to avoid spikes (unless you’re doing some form of stress testing).
=> How to add ‘Constant Throughput Timer’ in JMeter script?
- Right-click on the Thread Group.
- Hover the mouse on ‘Add’
- Hover the mouse on ‘Timer’
- Click ‘Constant Throughput Timer’
=> What are the input fields of ‘Constant Throughput Timer’?
- Name: To provide the name of the timer
- Comments: To provide arbitrary comments (if any)
- Target throughput (in samples per minute): Number of requests that need to be triggered in a minute. If you need to achieve a 10,000 requests target in an hour then the target throughput value will be around 167 (=10000/60).
- Calculate Throughput based on: Choose an appropriate option as per the requirement. A description of the option is given below:
- this thread only: This option allows each thread to maintain its own target throughput irrespective of group. The overall throughput will be proportional to the number of active threads. Let’s take an example: if there are 5 users with 5 samplers and the target throughput value is set to 3 seconds then each thread will send 3 requests per minute separately. So, the triggered request after 1 minute will be 45 (=5 x 3). Each thread will send 3 requests per minute:

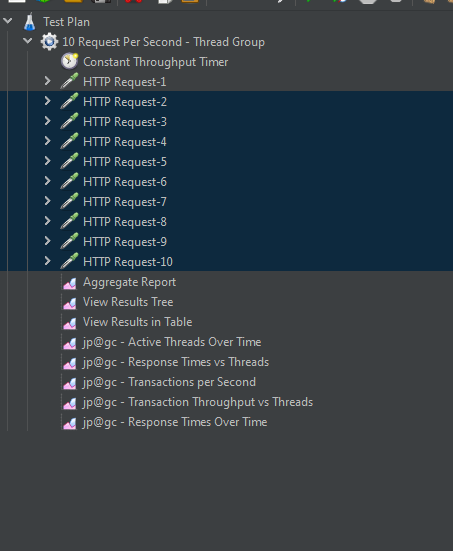
5. Add multiple requests
- Create 9 other requests with another API in the same thread group.
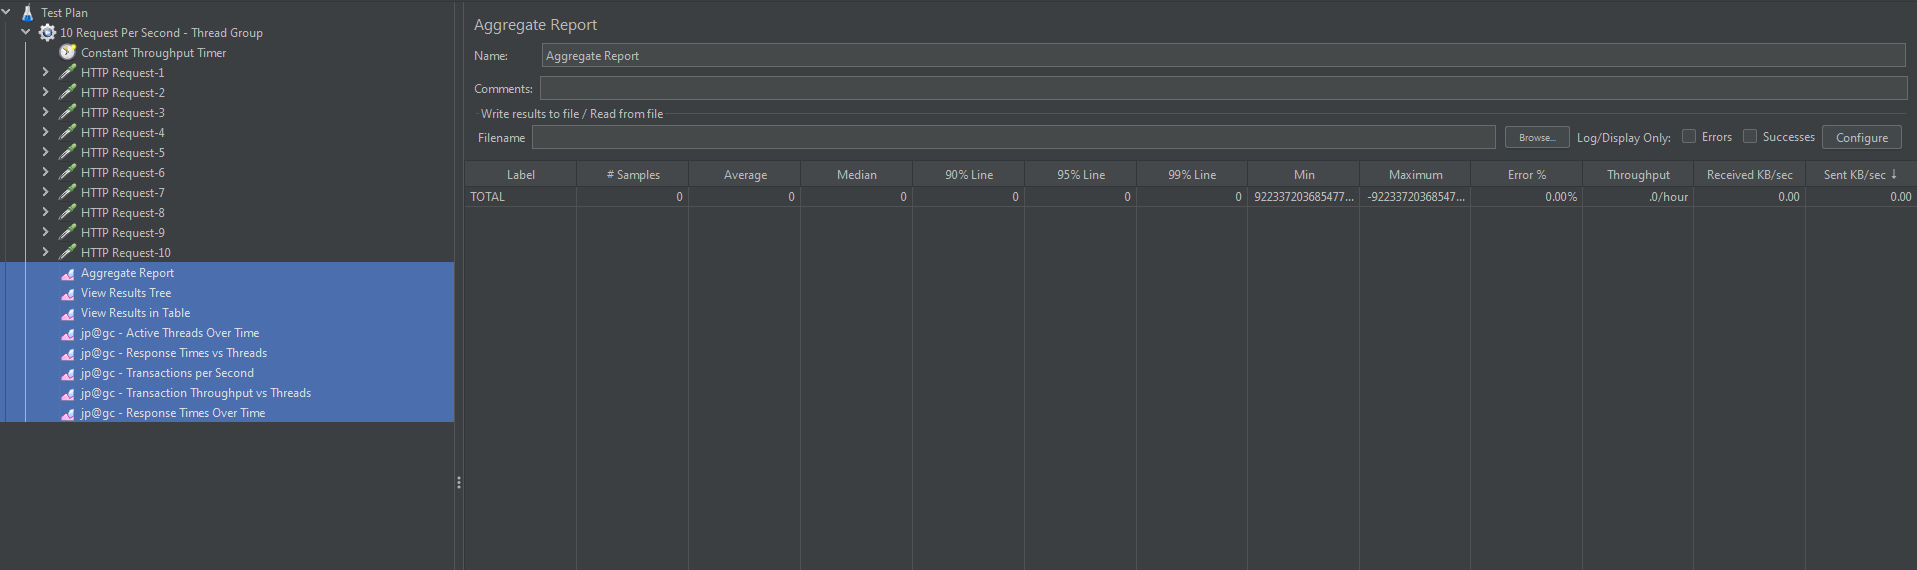
6. Adding Listeners
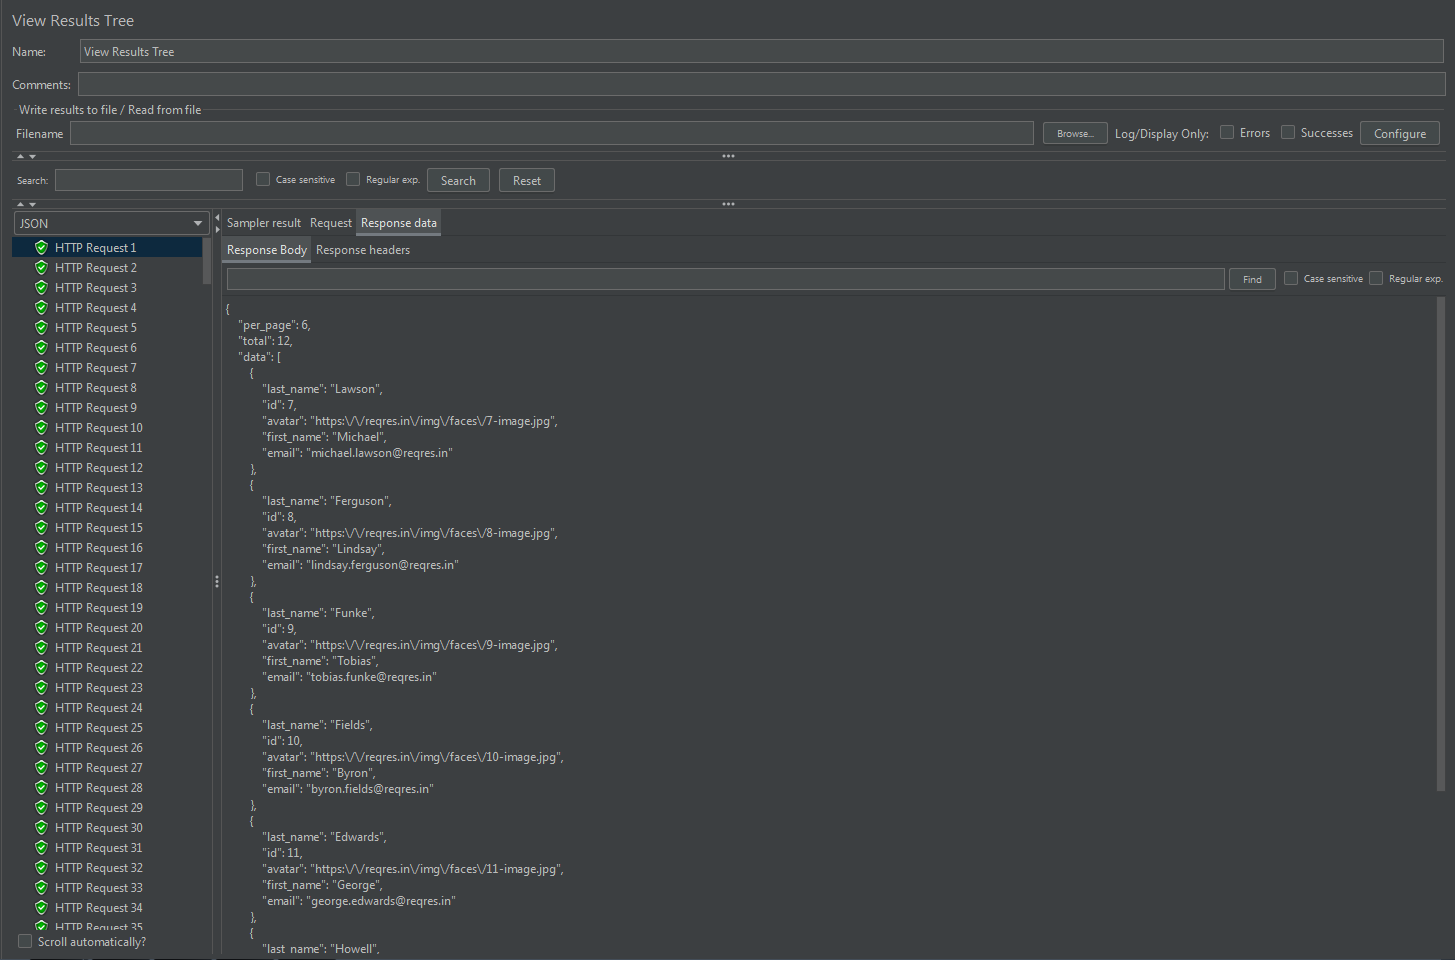
- Now all you need to do is run the script and verify the result for that. Click on “Thread group->Add > Listener > View Results Tree”.
- Add below all listeners in the Thread group.
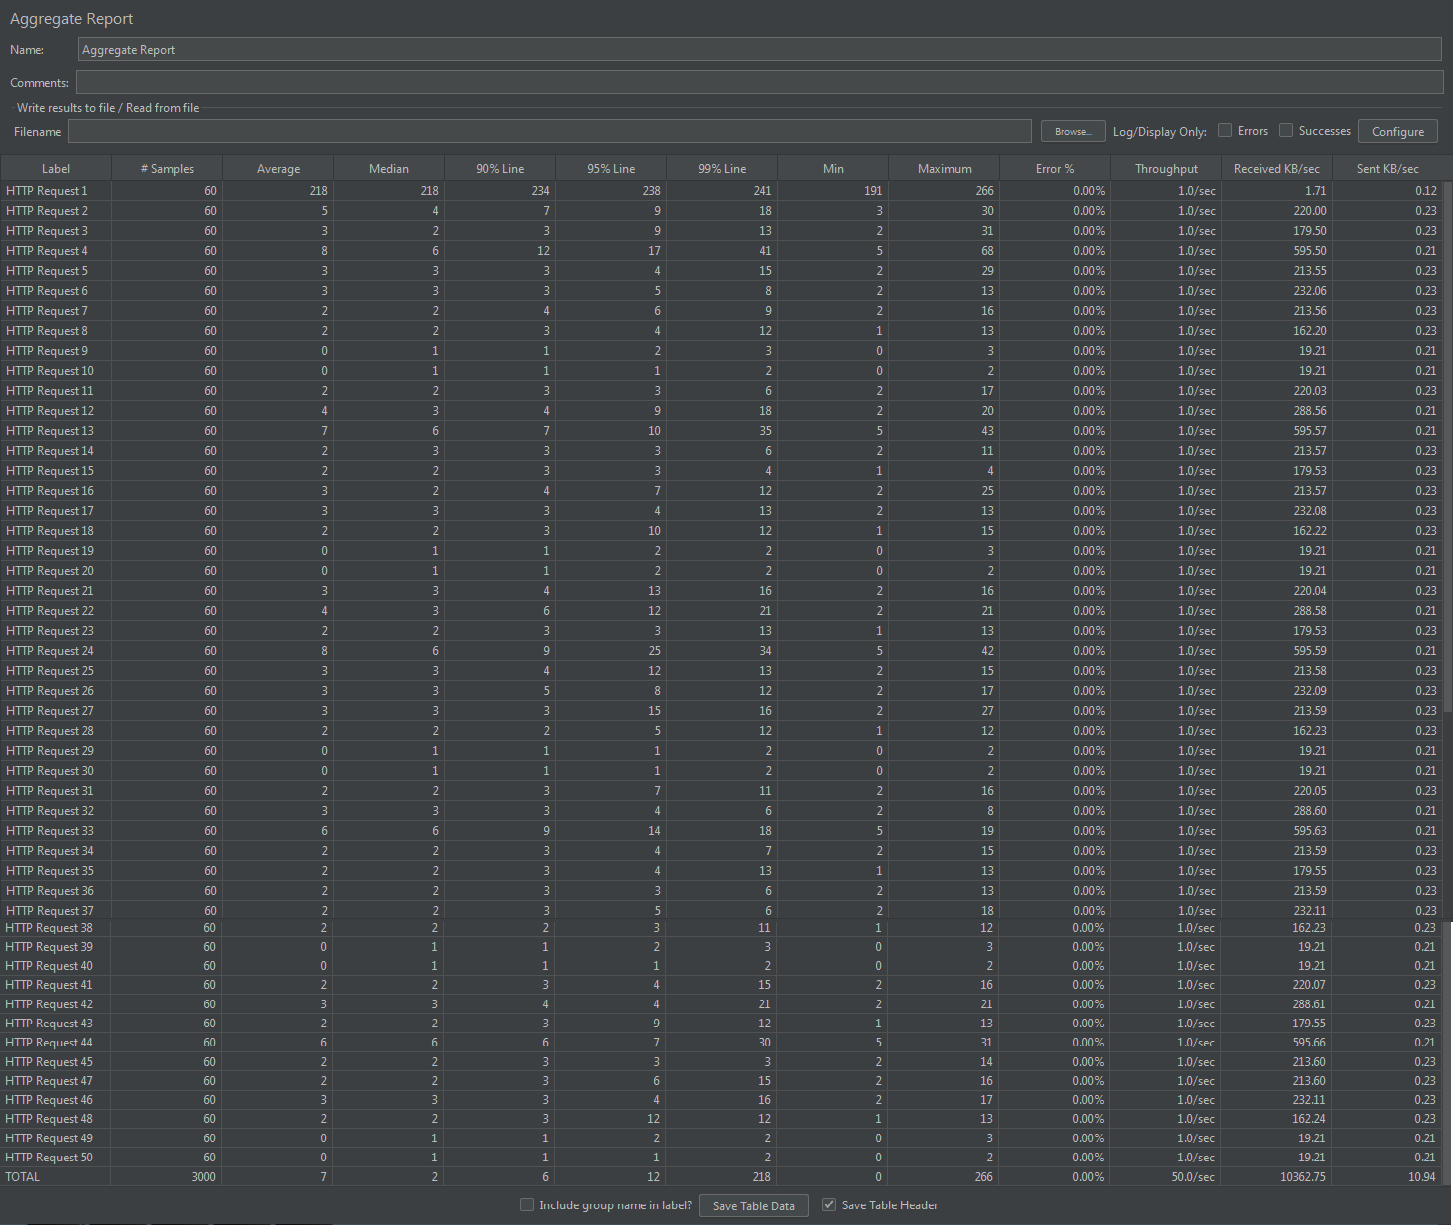
- Aggregate Report
- View Results Tree
- View Results in Table
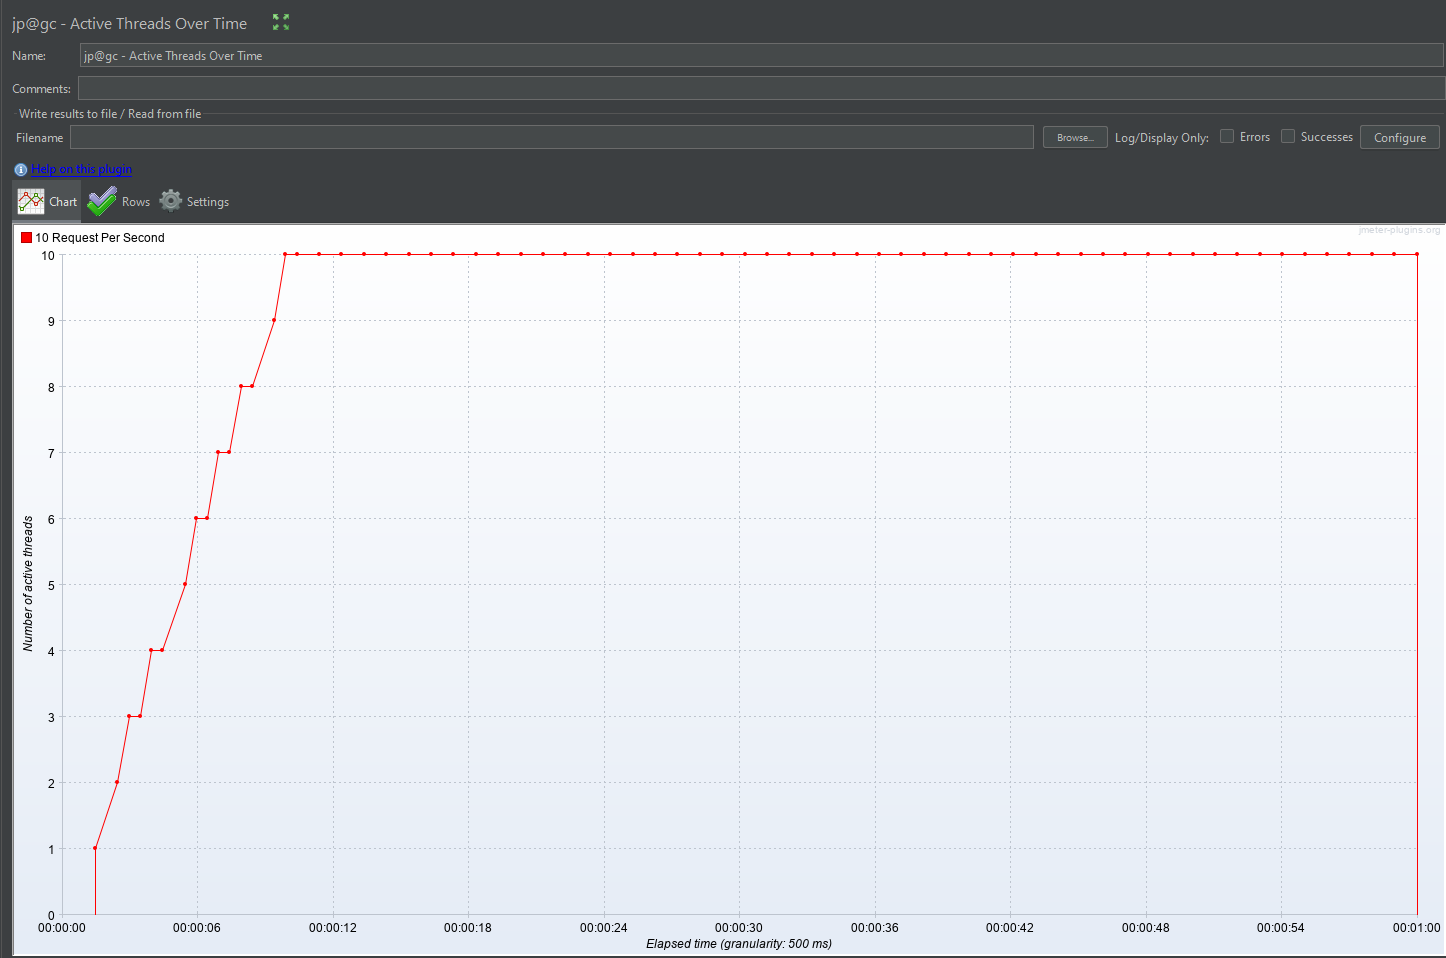
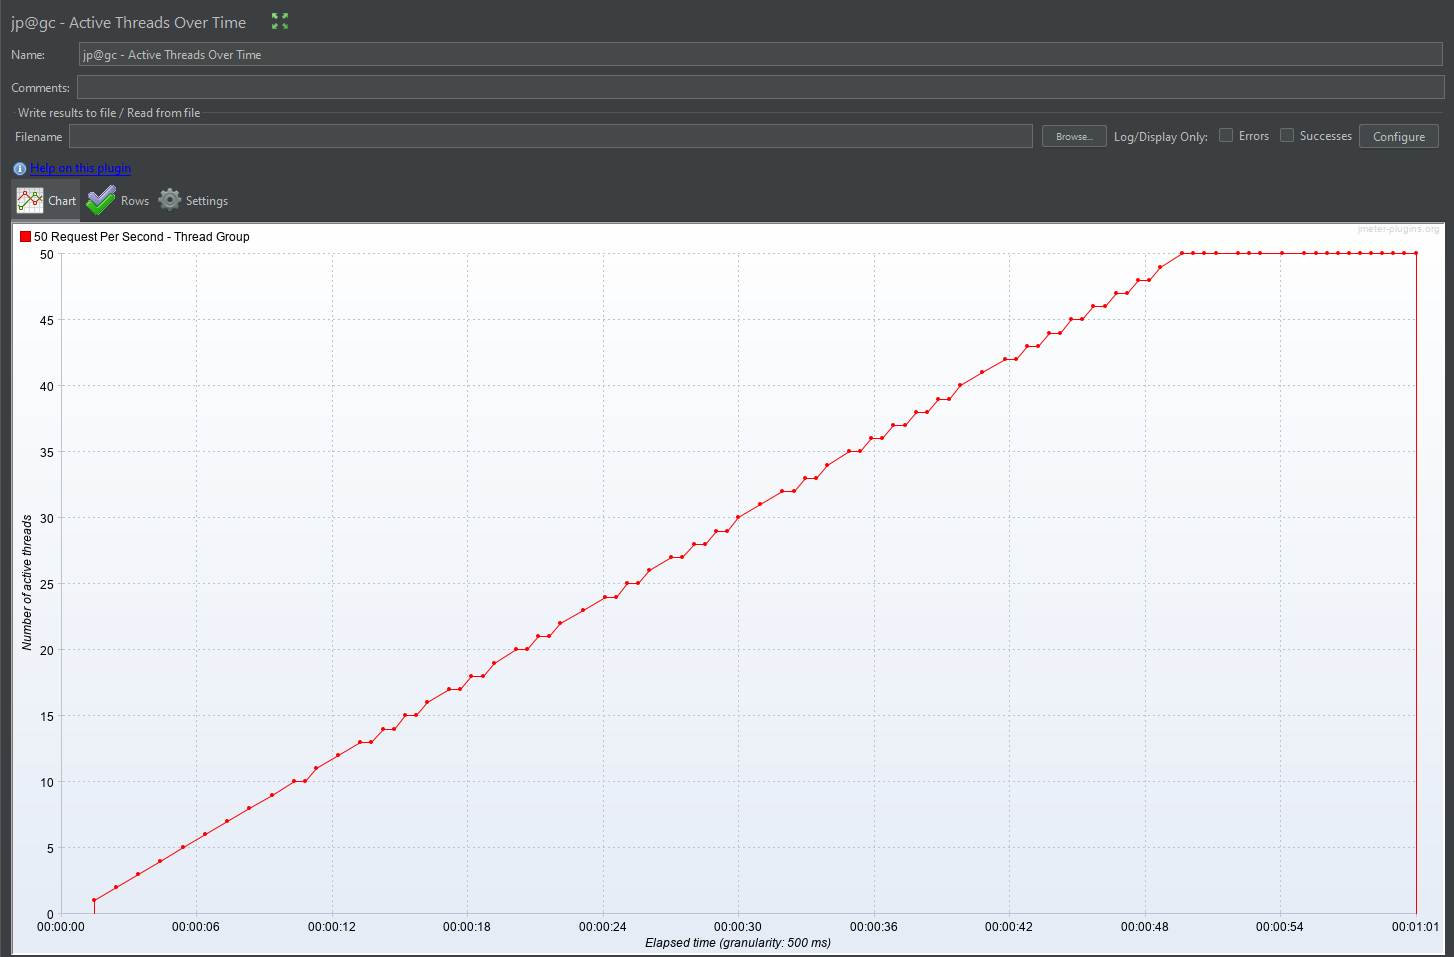
- jp@gc – Active Threads Over Time
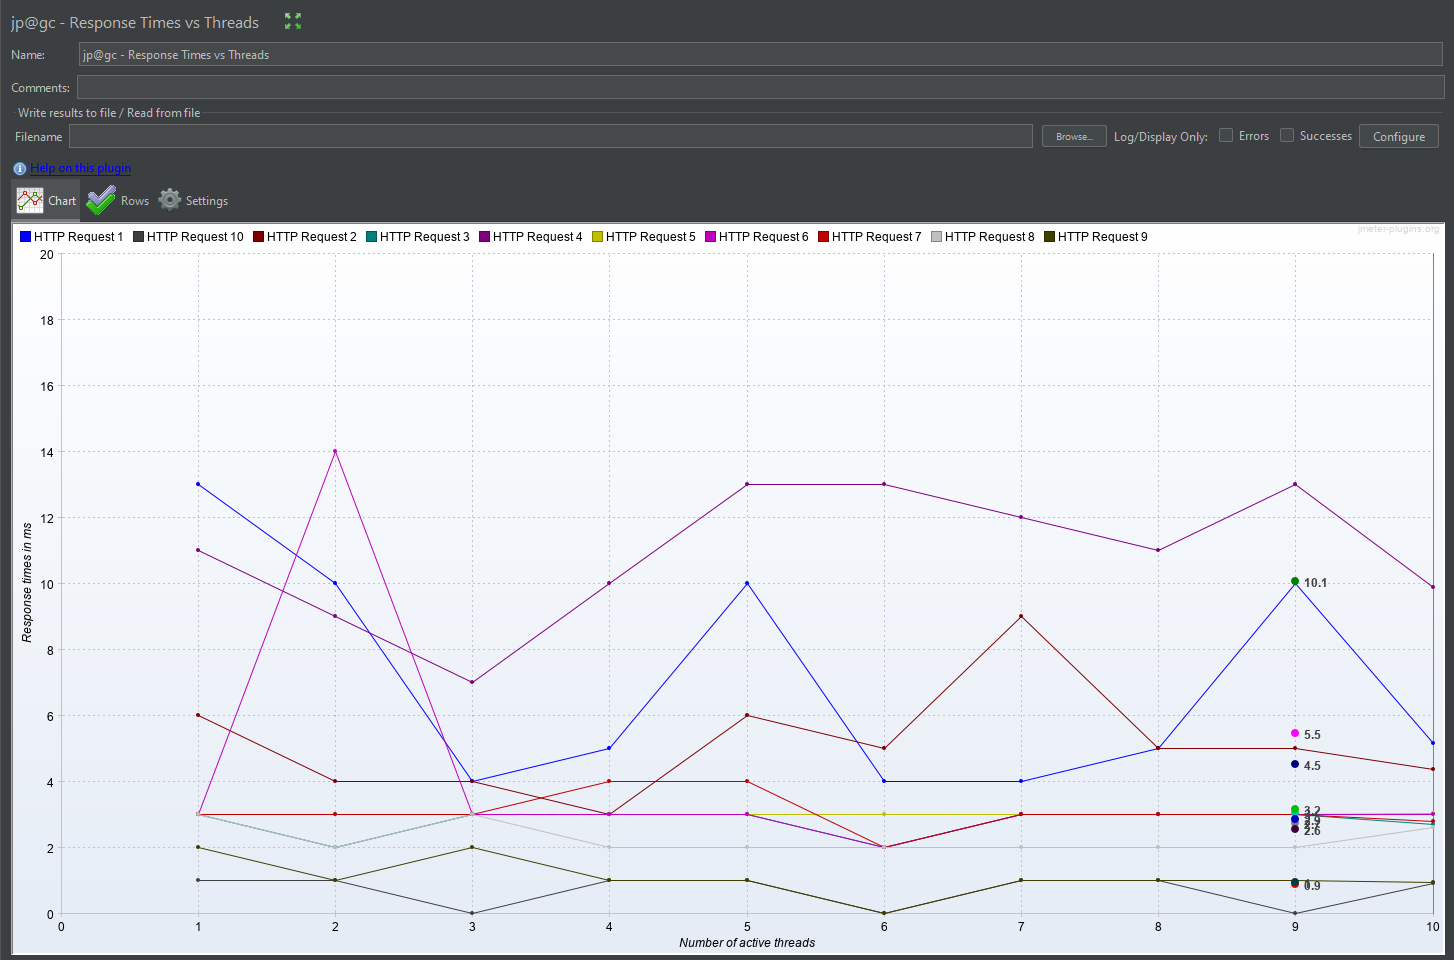
- jp@gc – Response Times vs Threads
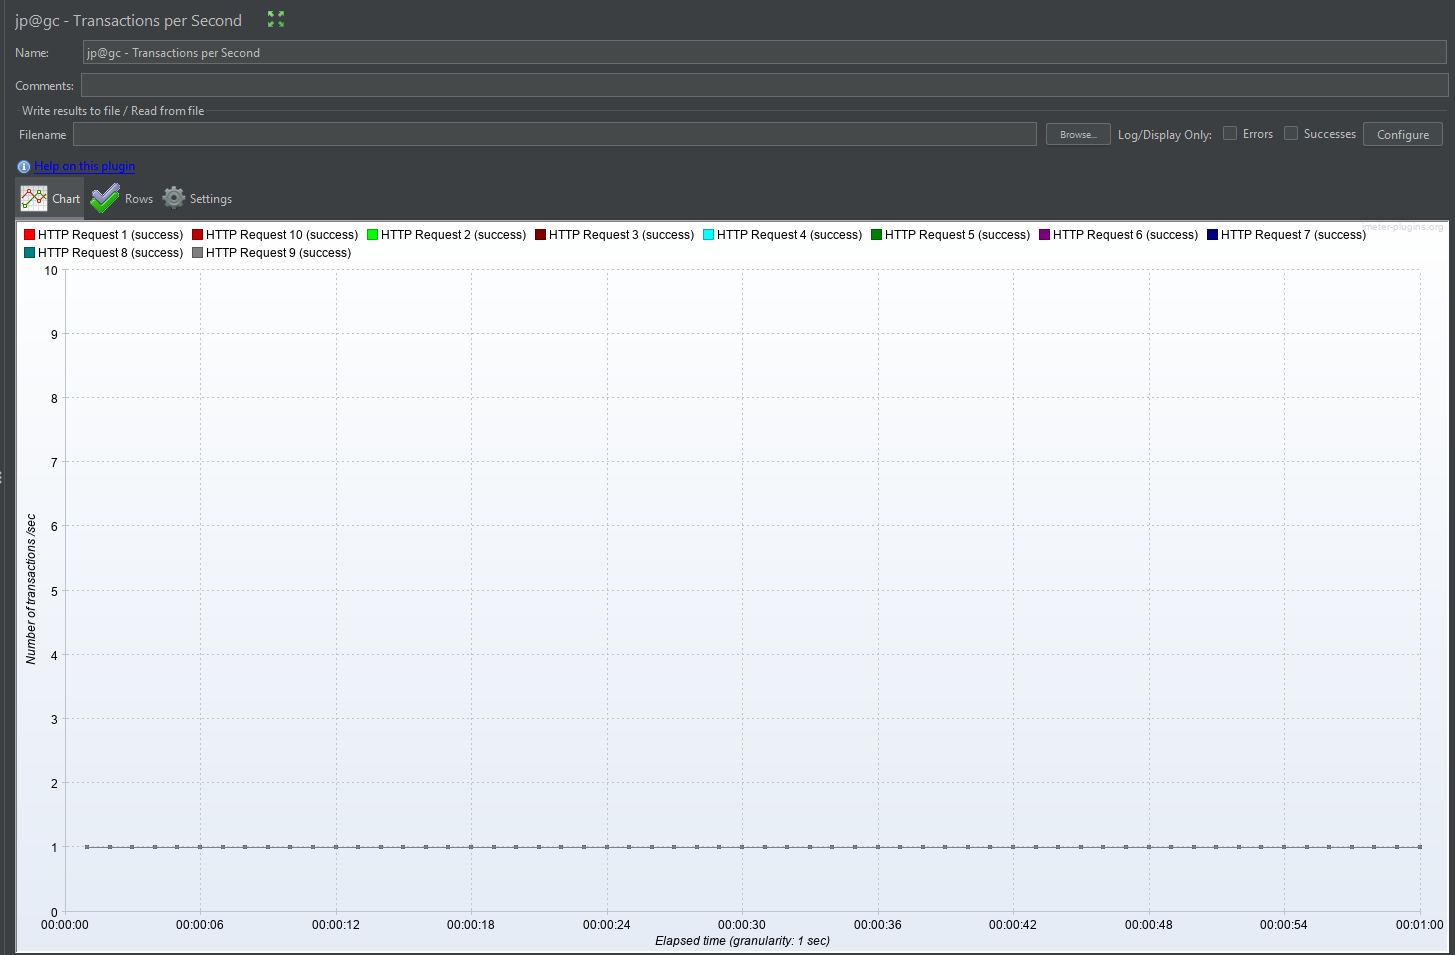
- jp@gc – Transactions per Second
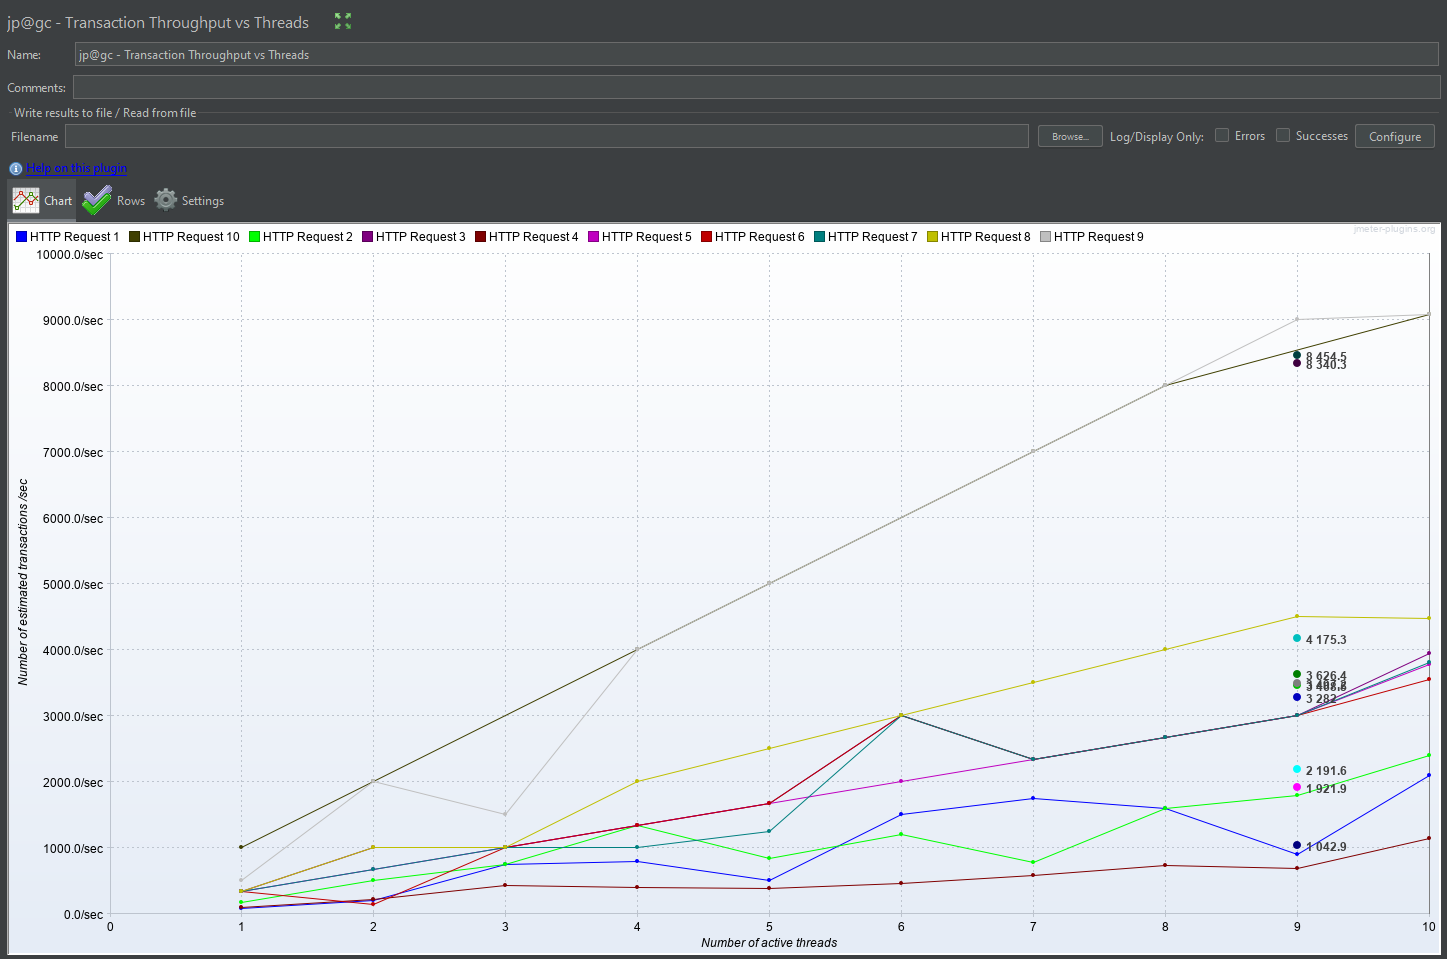
- jp@gc – Transaction Throughput vs Threads
- jp@gc – Response Times Over Time
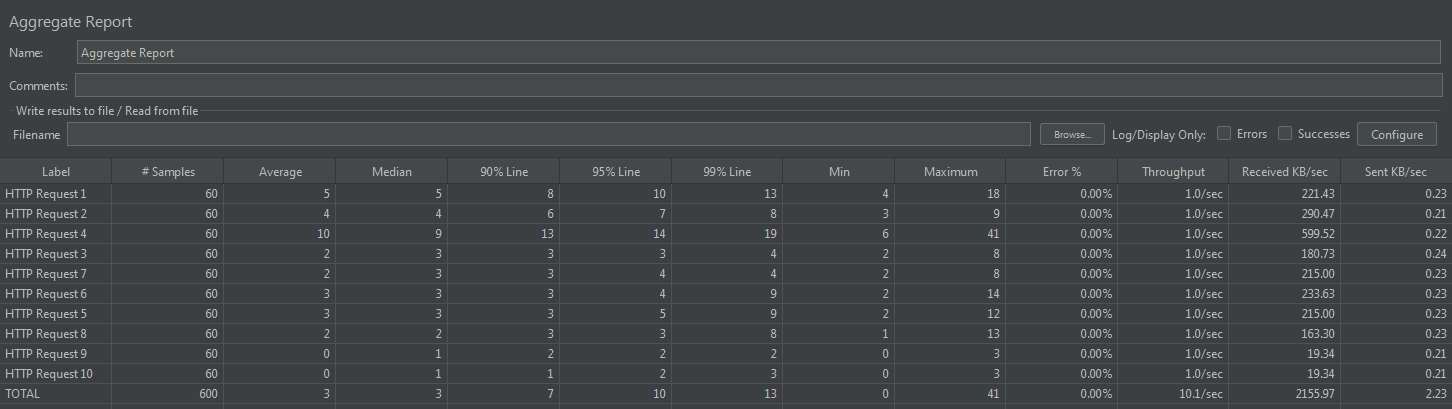
=> Result
- Now you can see I am getting the positive response after running my thread group and also verifying that it takes passphrases sequentially.
- Aggregate Report
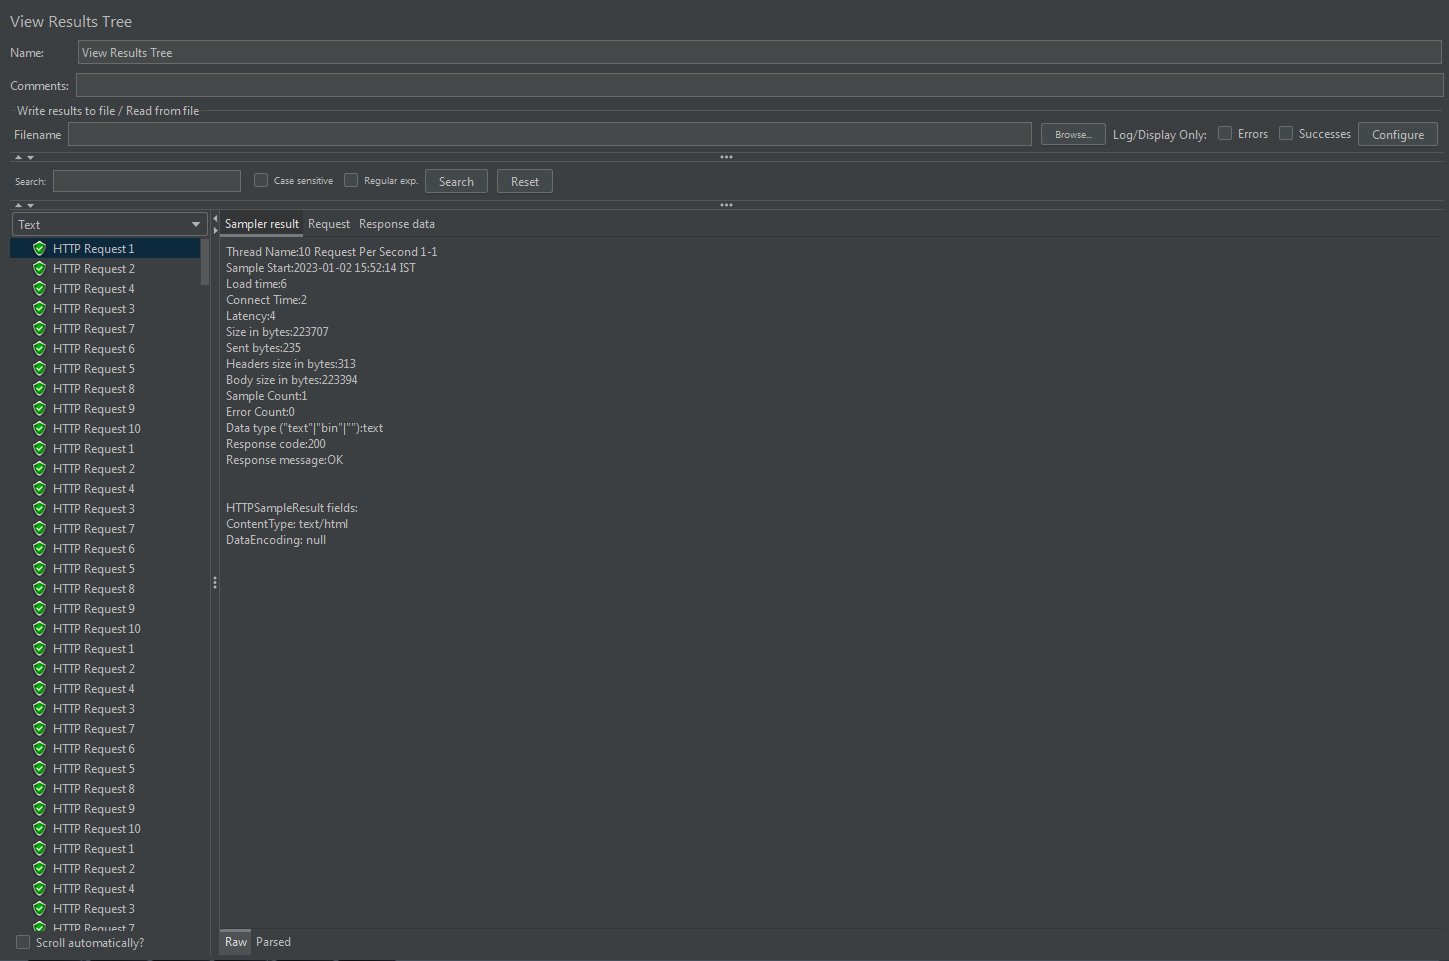
2. View Results Tree
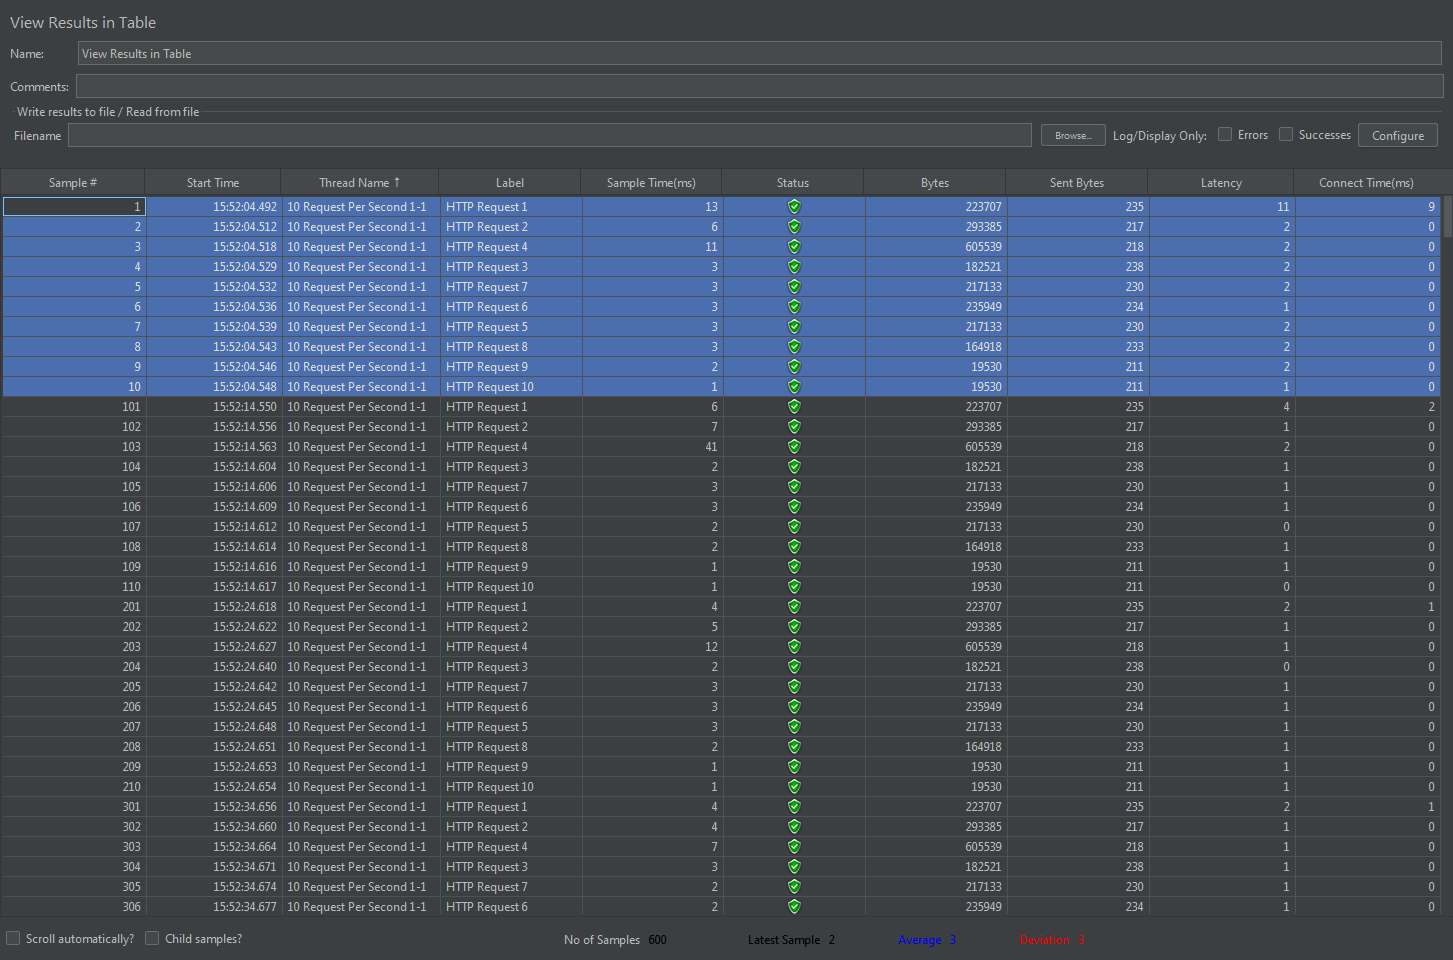
3. View Results in Table
4. jp@gc – Active Threads Over Time
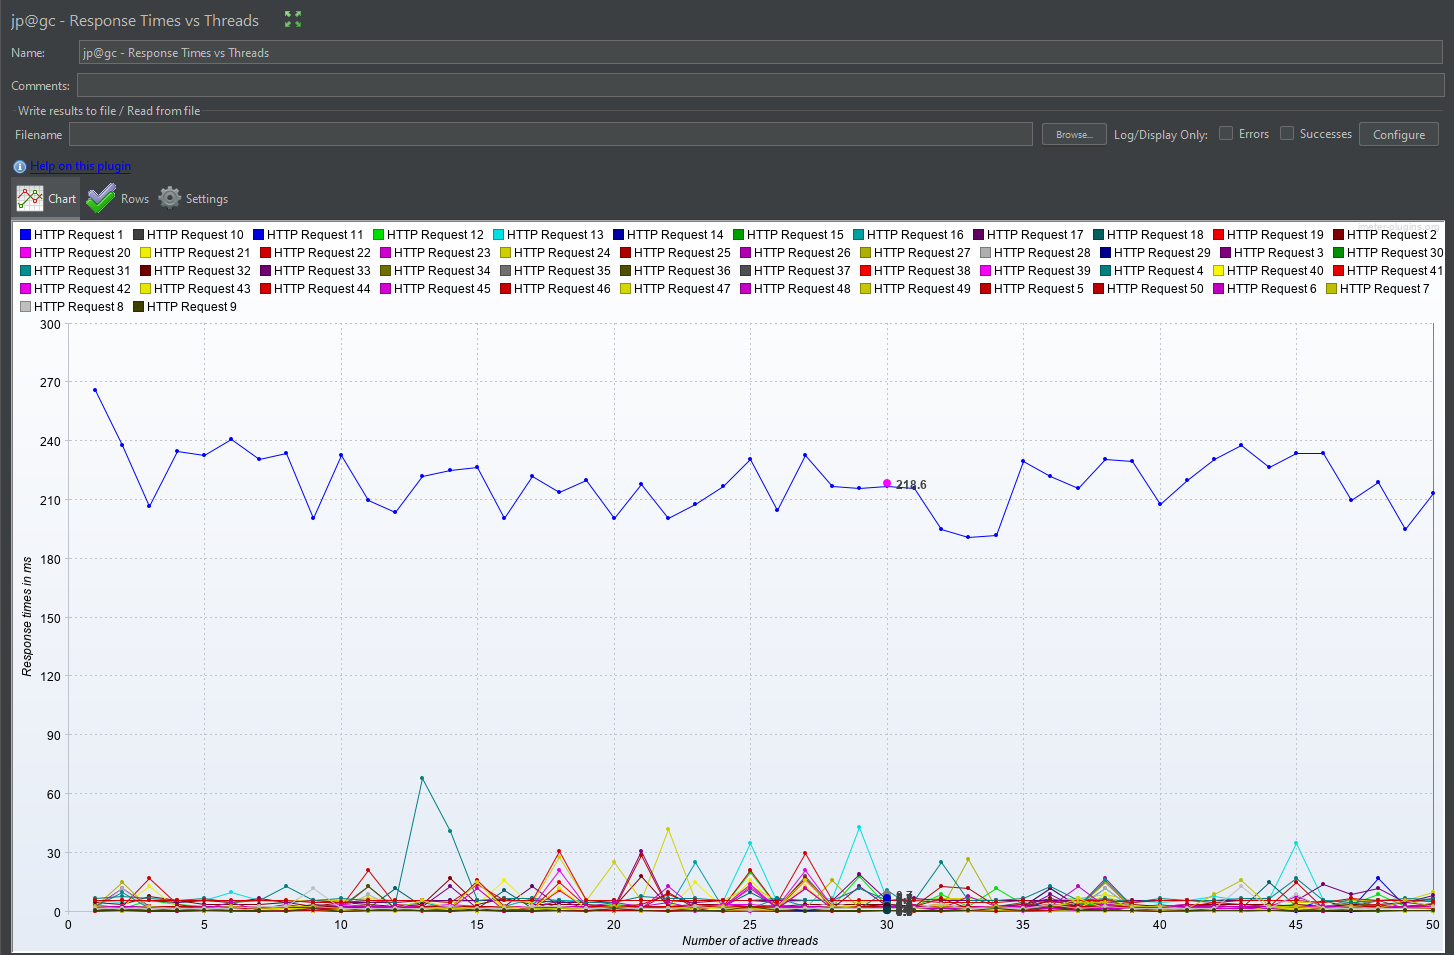
5. jp@gc – Response Times vs Threads
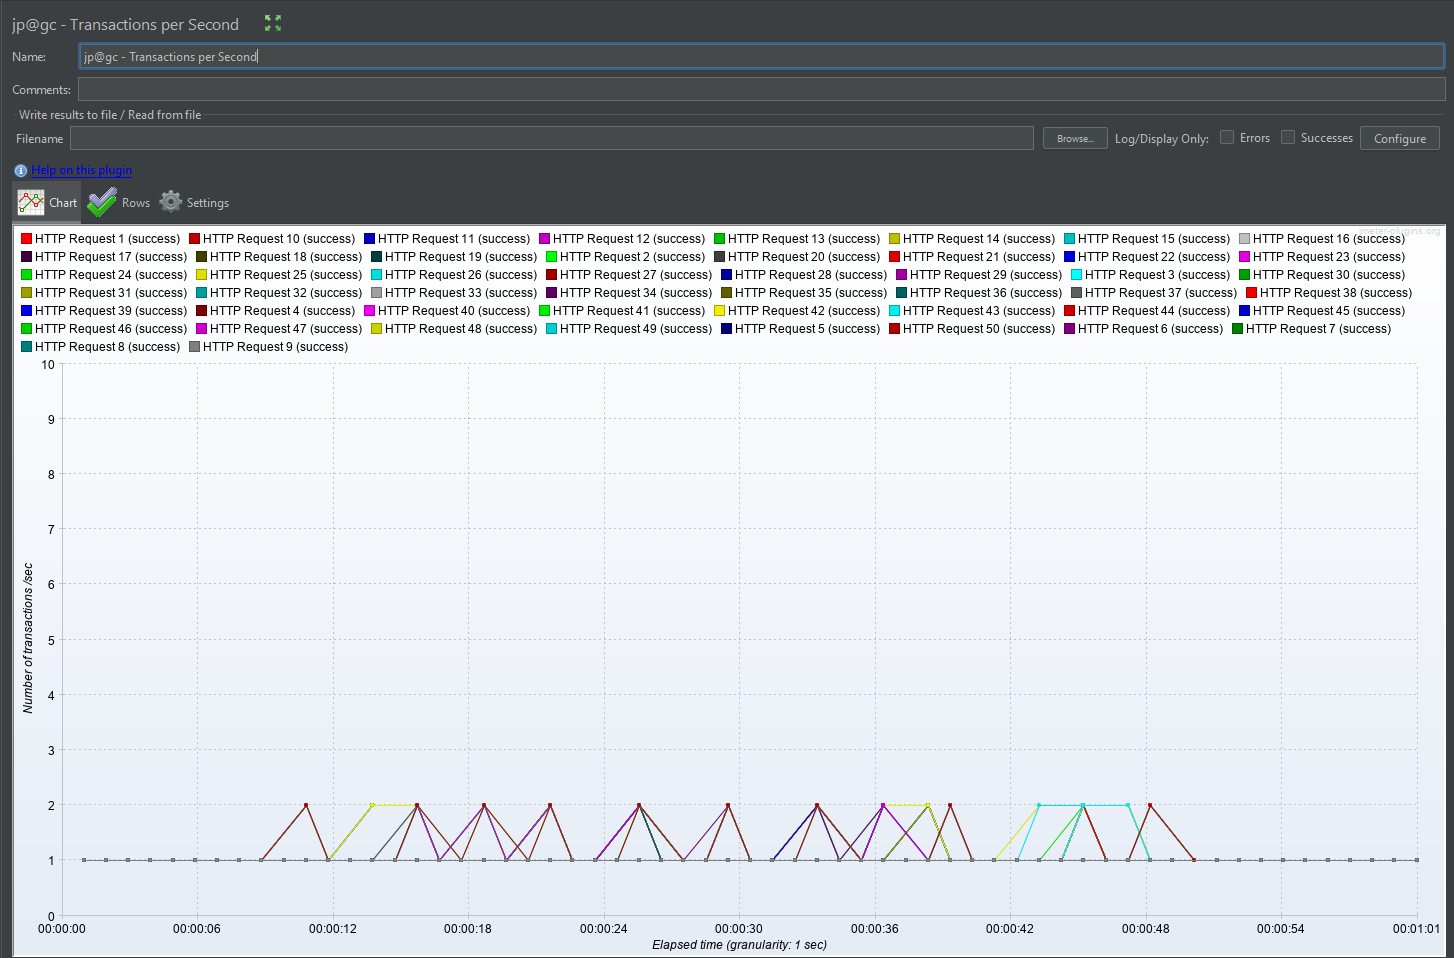
6. jp@gc – Transactions per Second
7. jp@gc – Transaction Throughput vs Threads
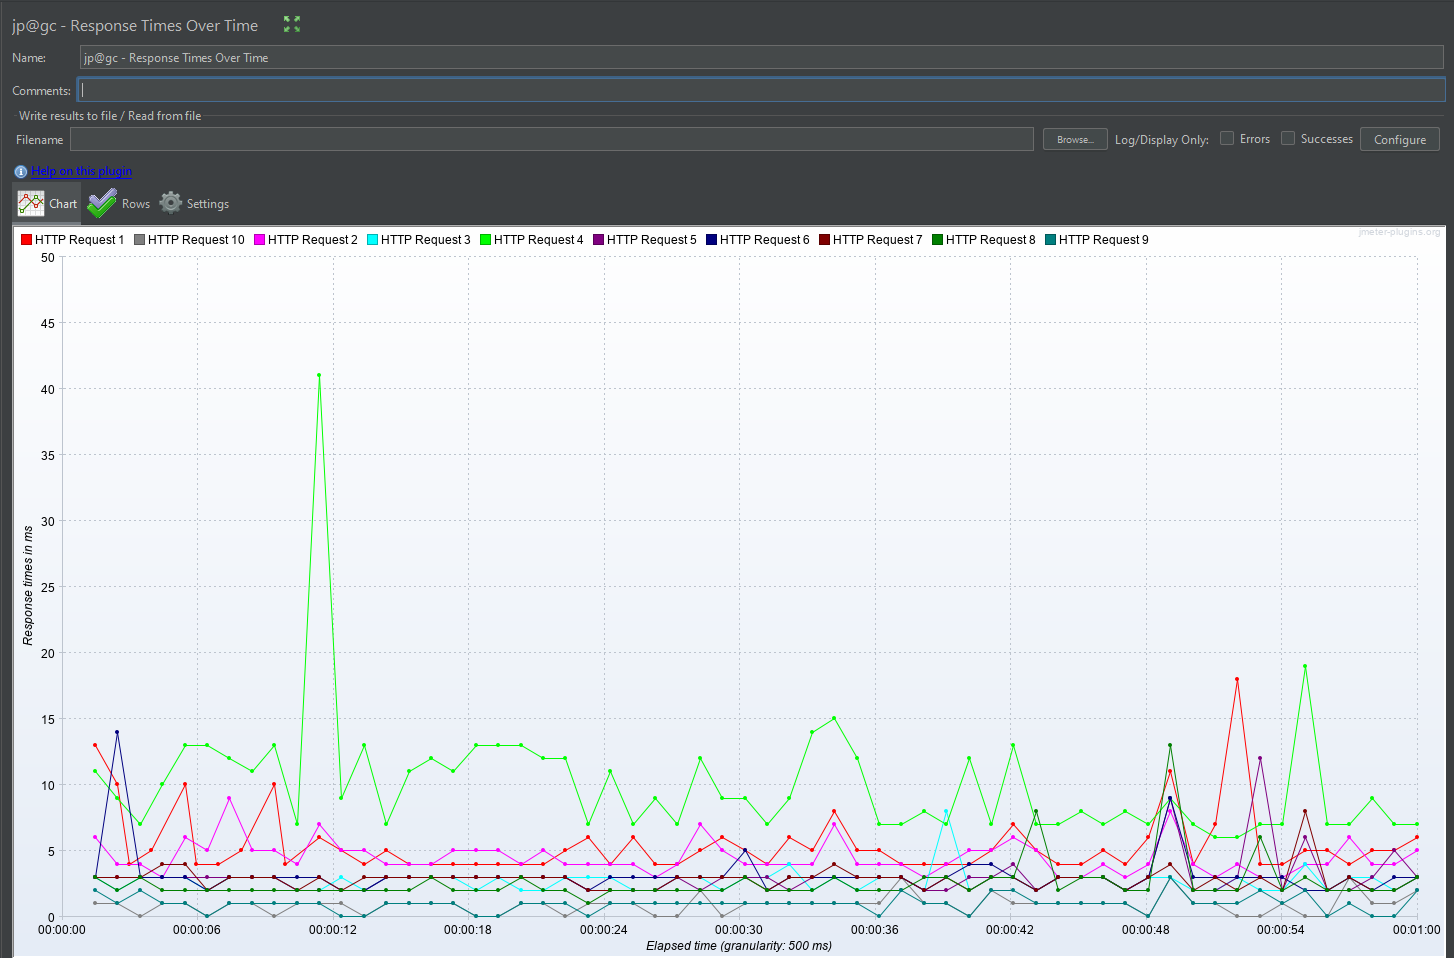
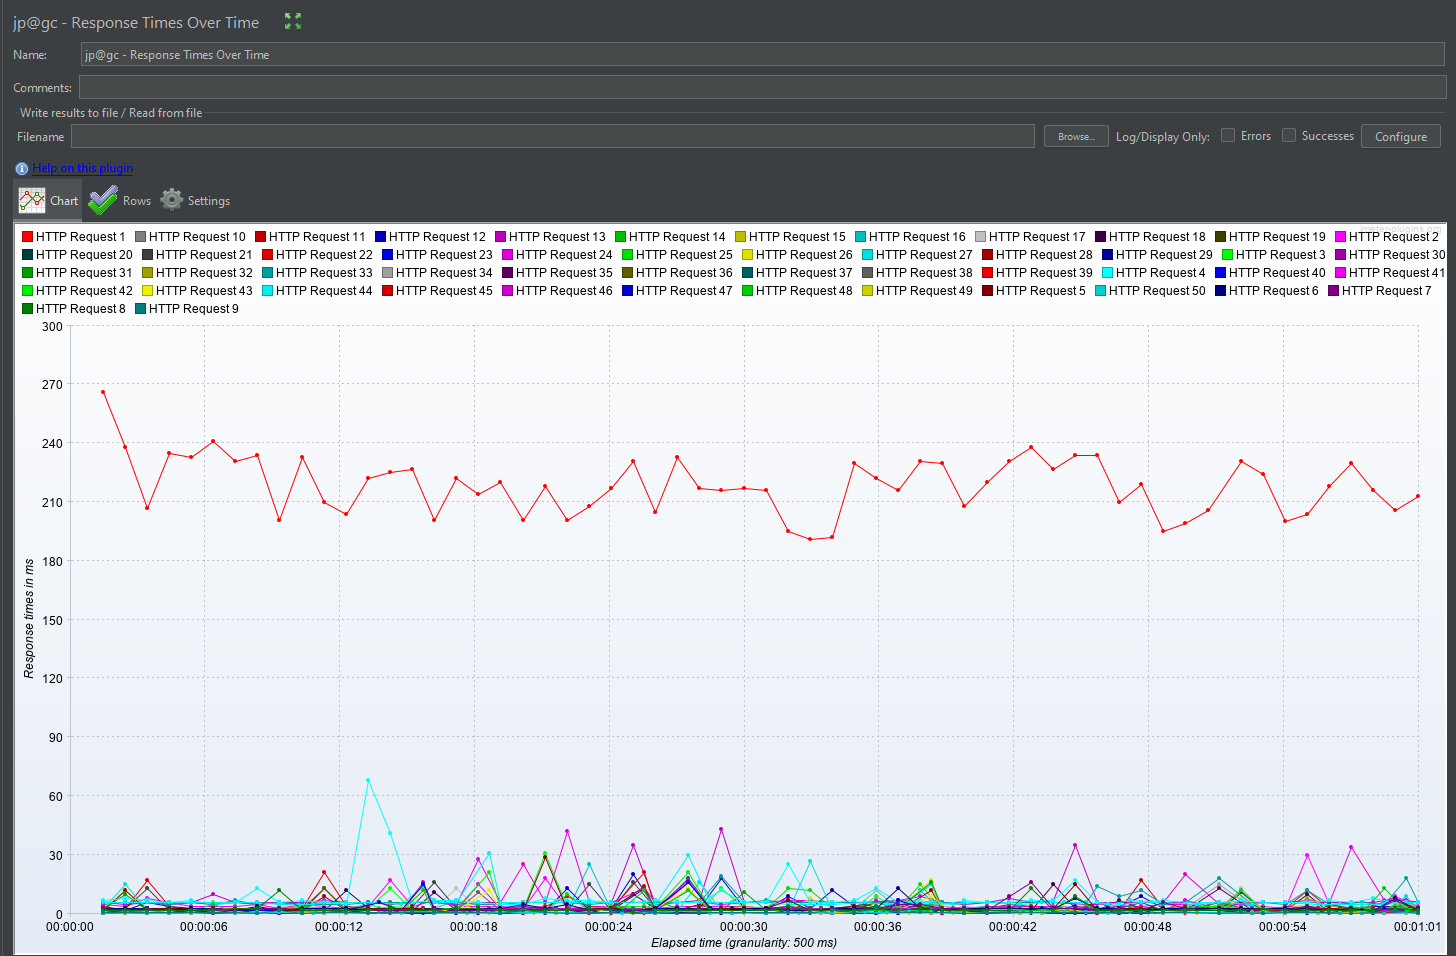
8. jp@gc – Response Times Over Time
Scenario 2 : How to send 50 requests per second?
=> Steps to Perform API Testing in JMeter
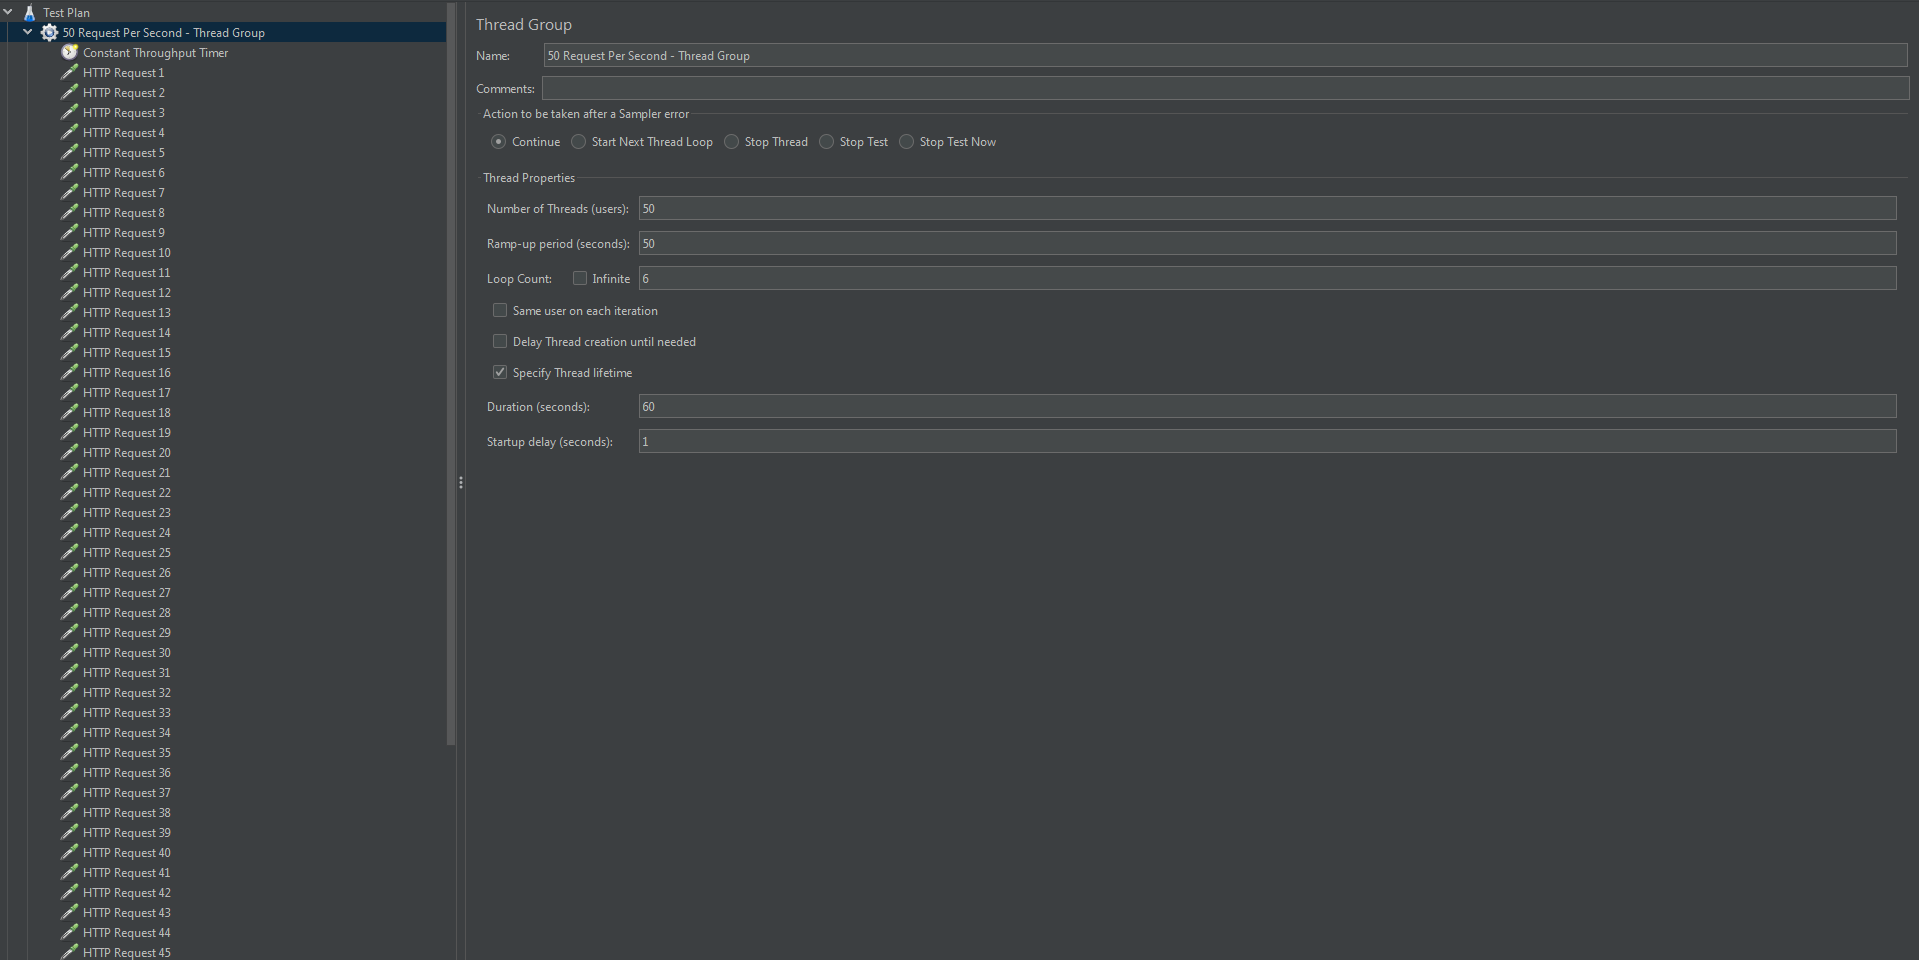
1. Adding a Thread Group
- Firstly, you have to start your JMeter and select the Test Plan.
- Next, Right click on the Test Plan and add a Thread Group.
- Rename the Thread Group and save it.
- Add Thread Group Property as per below.
- Number of Threads (Users) : 50
- Ramp-up period(seconds) : 50
- Loop Count : 6
- Specify Thread lifetime :
Duration(Seconds) : 60
Satrtup delay (Seconds) : 1

2. Add Constant Throughput Timer
3. Add 50 HTTP Request Sampler
Next, you can search for REST APIs that are freely available on the internet. Copy the Server Name, Path, and Parameters for that particular API.
- Now, select some sample APIs, as given below;
- Go to your browser
- Search for “some sample rest API for testing”
- Open the first link “https://reqres.in/”
- Let’s create and run GET Rest API requests in JMeter in the demo.
- Here, in this link, you can GET, POST, PUT, and DELETE Rest APIs.
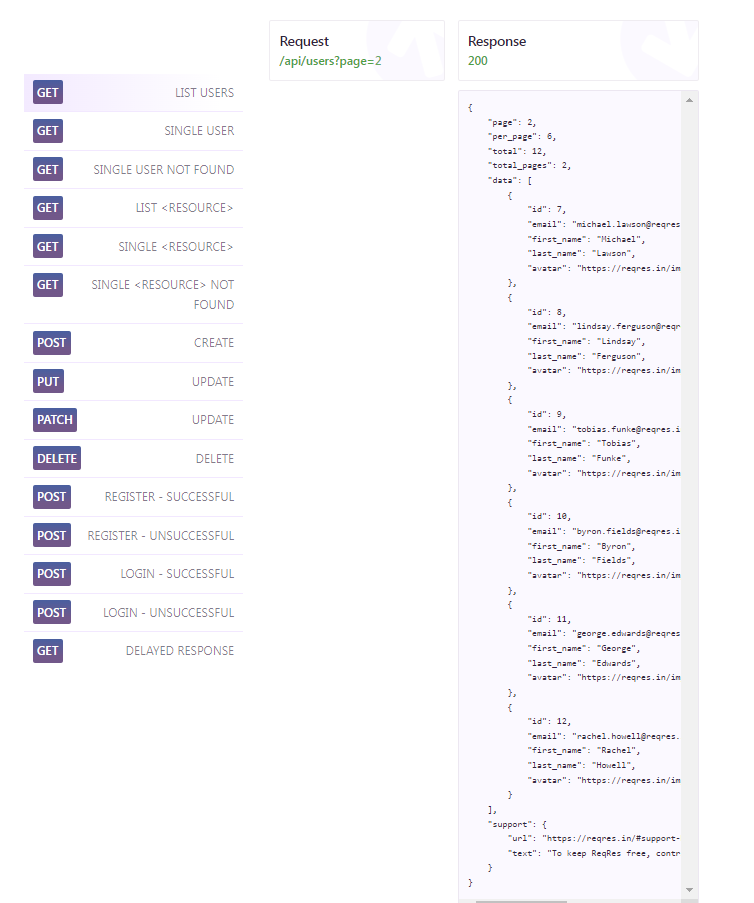
- So, choose the first link: List Users.
- Here, click on the request link
- Open the link that appears in the new tab
- Identify the URL for this API
- Copy this URL and open the JMeter window
- Then in the JMeter window, do the following:
- Right-click on the Thread Group
- Navigate to “add”
- In the box that appears, select “samplers”
- You can see the types of requests that JMeter can work on
- Choose the HTTP request.
- Here, you will have to give the address to some home pages or websites
- In the Server Name or IP box, give paste the GET API request URL
- In the Protocol box, put “HTTPS”
- If the URL in the protocol was HTTP, this box would have been left empty. In the URL, put the URL link; remember not to put any slashes in the IP Address. Also, anything after the URL should be put in the path.
- Now, put the path from the URL in the path box
- Now, put the path from the URL in the path box
- Next, you must take part of the URL, beginning with the “question mark” and use it to assign the parameters. This is required since it is the GET API type.
- Add the name in the parameters
- Give the name as page and value as 2
- Here I have changed the sampler name as HTTP Request-1 and created other samplers with different APIs as HTTP Request-2 up to HTTP Request-50 as per the below image.
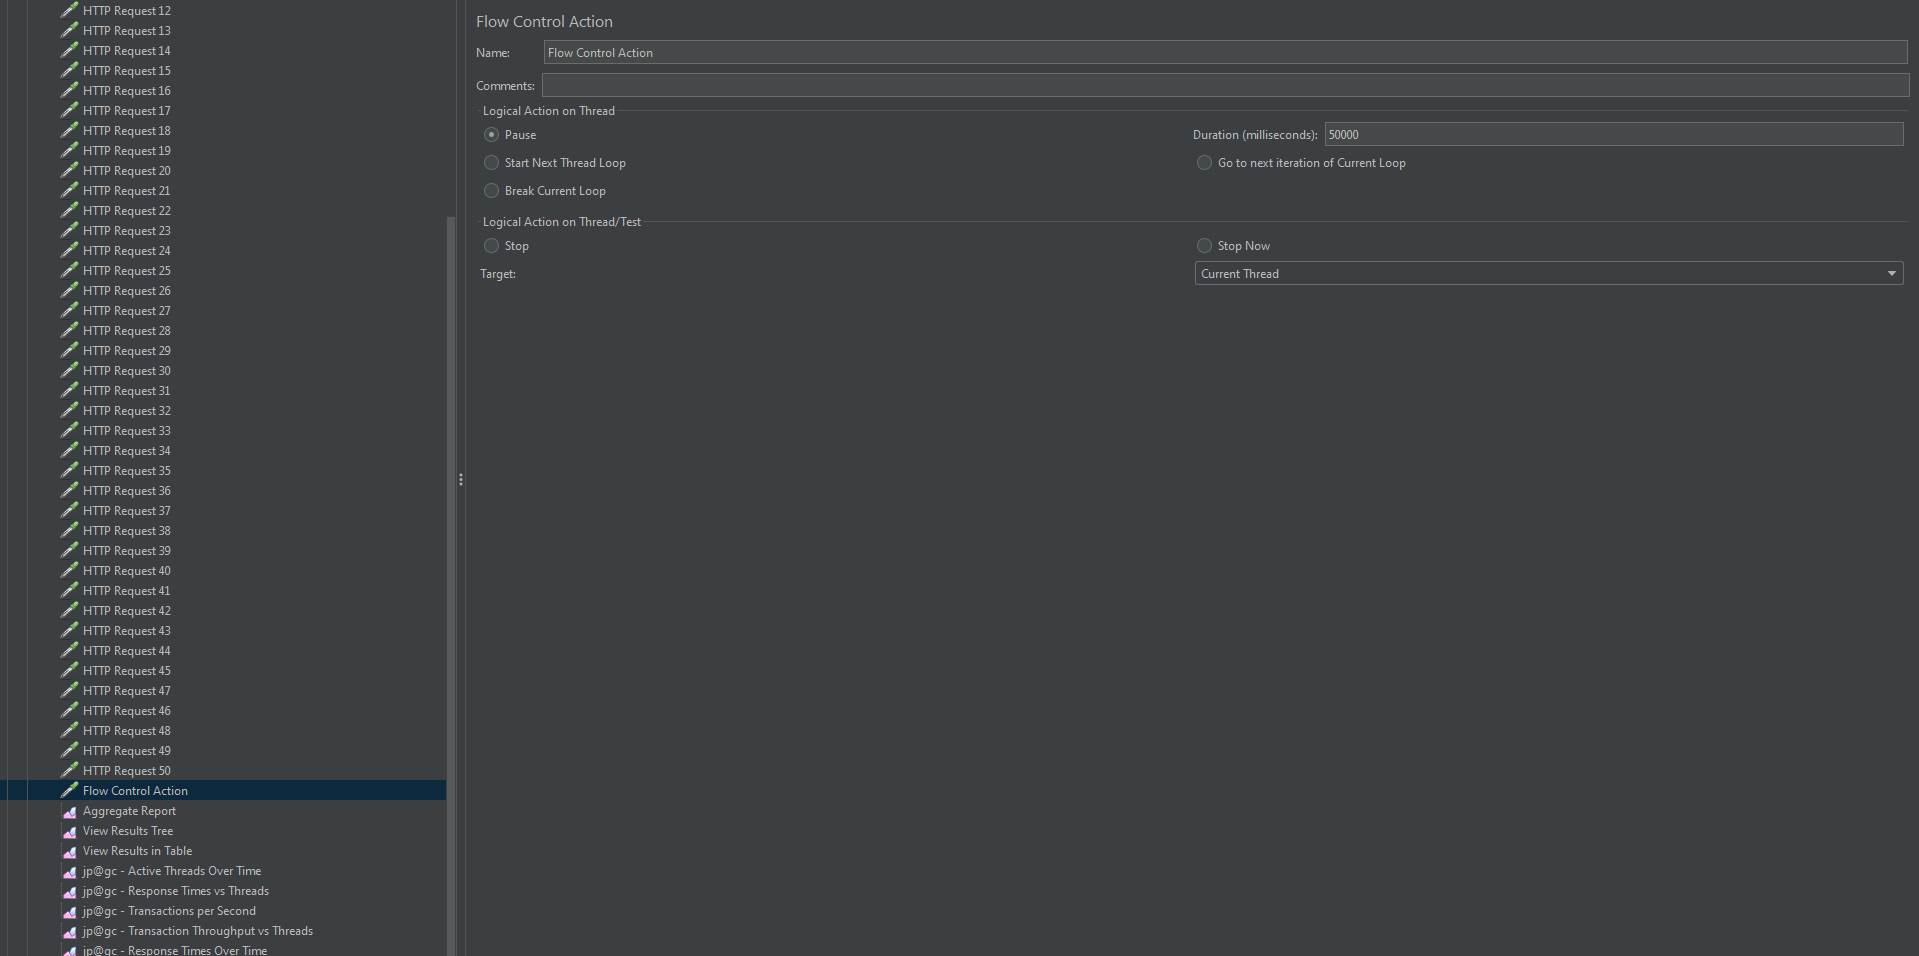
4. Add Flow Control Action
- Flow Control Action sampler is used along with the logical controllers to control the sampler execution.
- To pause (sleep) current or all thread for specified amount of time (duration is set in milliseconds). You could use a JMeter variable or property to set a dynamic value
- To stop the current or all threads after completing the execution of samples in progress
- To stop the current or all threads immediately without waiting for samples in progress to complete. Stop Now option should be selected.
- Now, select Flow Control Action, as given below;
- Right-click on the Thread group
- Navigate to “add”
- In the box that appears, select “samplers”
- You can see the types of requests that JMeter can work on
- Choose the Flow Control Action. (Note: Must be put “Flow Control Action” at ends of the request)

- Next, set the value as per the below image.
6. Adding Listeners
- Now all you need to do is run the script and verify the result for that. Click on “Thread group->Add > Listener > View Results Tree”.
- Add below all listeners in the Thread group.
- Aggregate Report
- View Results Tree
- View Results in Table
- jp@gc – Active Threads Over Time
- jp@gc – Response Times vs Threads
- jp@gc – Transactions per Second
- jp@gc – Transaction Throughput vs Threads
- jp@gc – Response Times Over Time

- Aggregate Report
2. View Results Tree
3. View Results in Table

4. jp@gc – Active Threads Over Time
5. jp@gc – Response Times vs Threads
6. jp@gc – Transactions per Second
7. jp@gc – Transaction Throughput vs Threads

8. jp@gc – Response Times Over Time
With these steps, you have successfully completed your API Testing. I hope you understood what is API and how you can test your API in JMeter.